Unity Tutorial
Completed October 7, 11:23 PM
Unity Tutorial
Unity is a complex game engine made (mostly) simple by a large community of users collaborating to make each other’s lives and projects easier. In this tutorial, I’ll try my best at doing the same both for beginners looking into it and as a note to myself should I forget and need a quick(ish) reminder. Feel free to zoom in.
The Basics
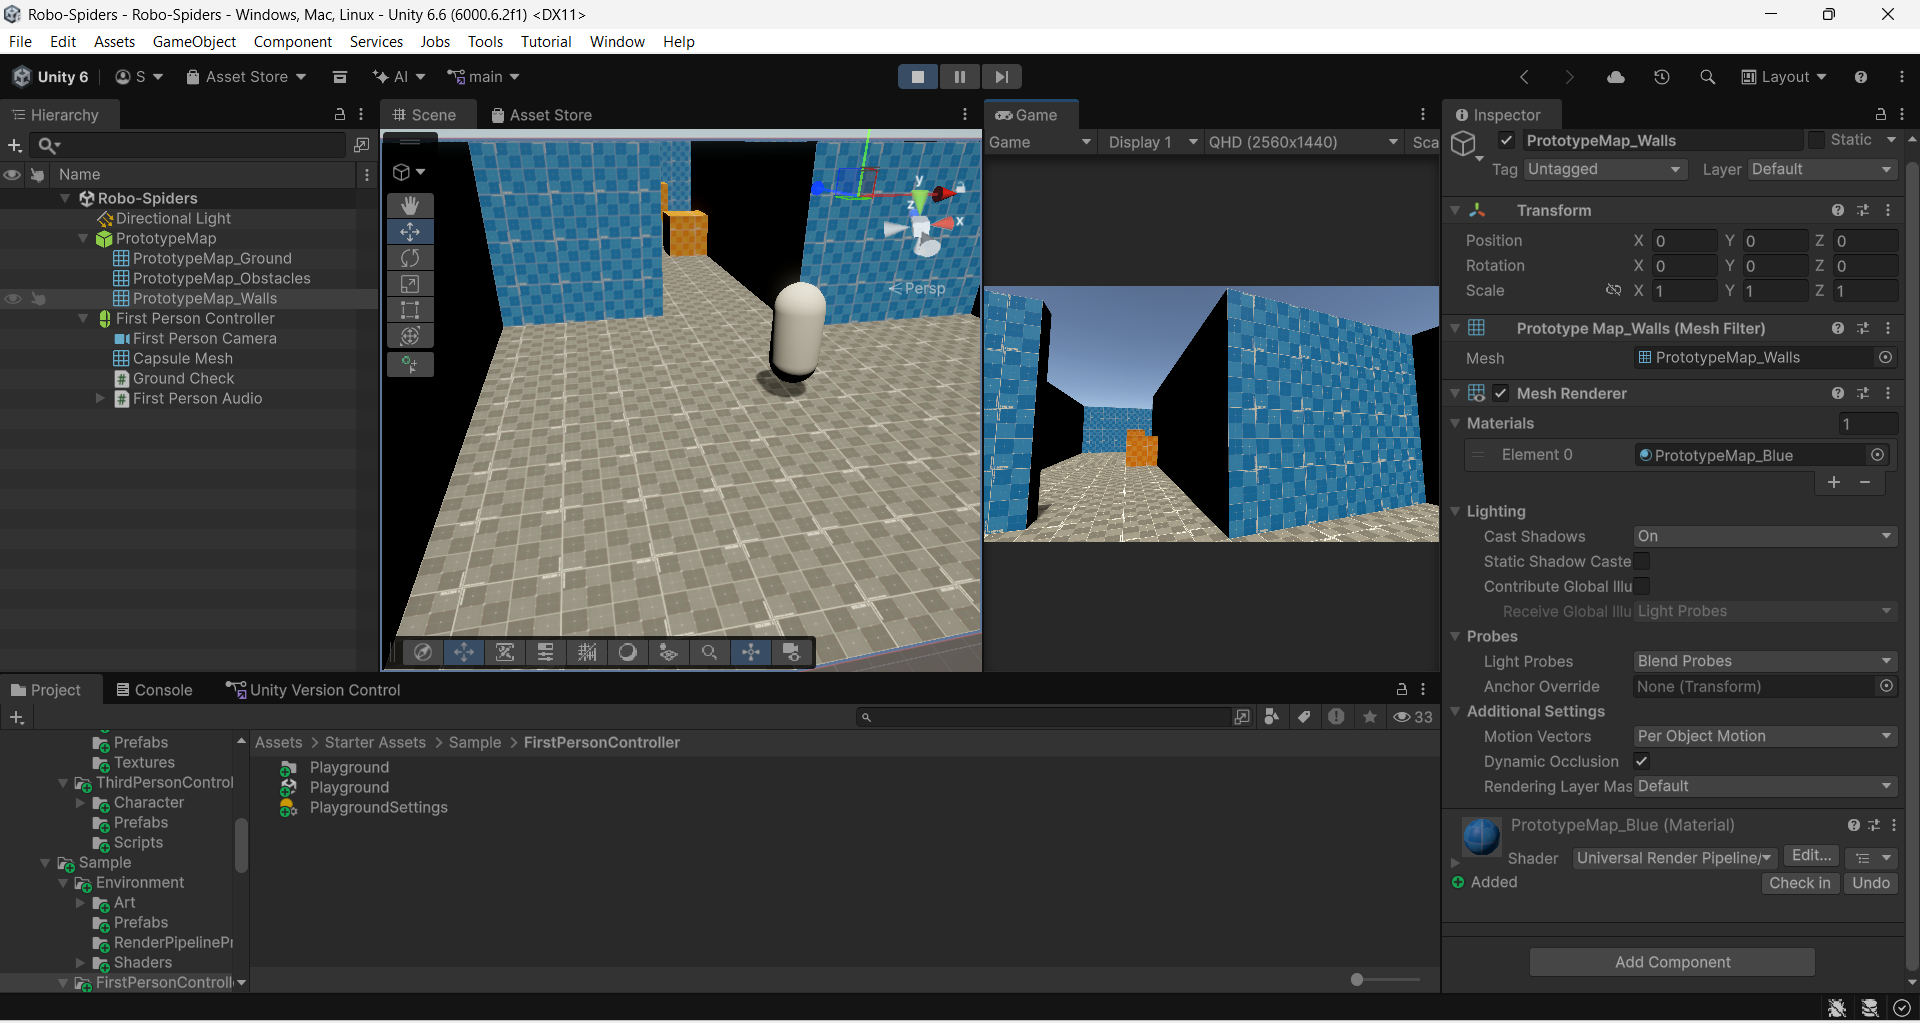
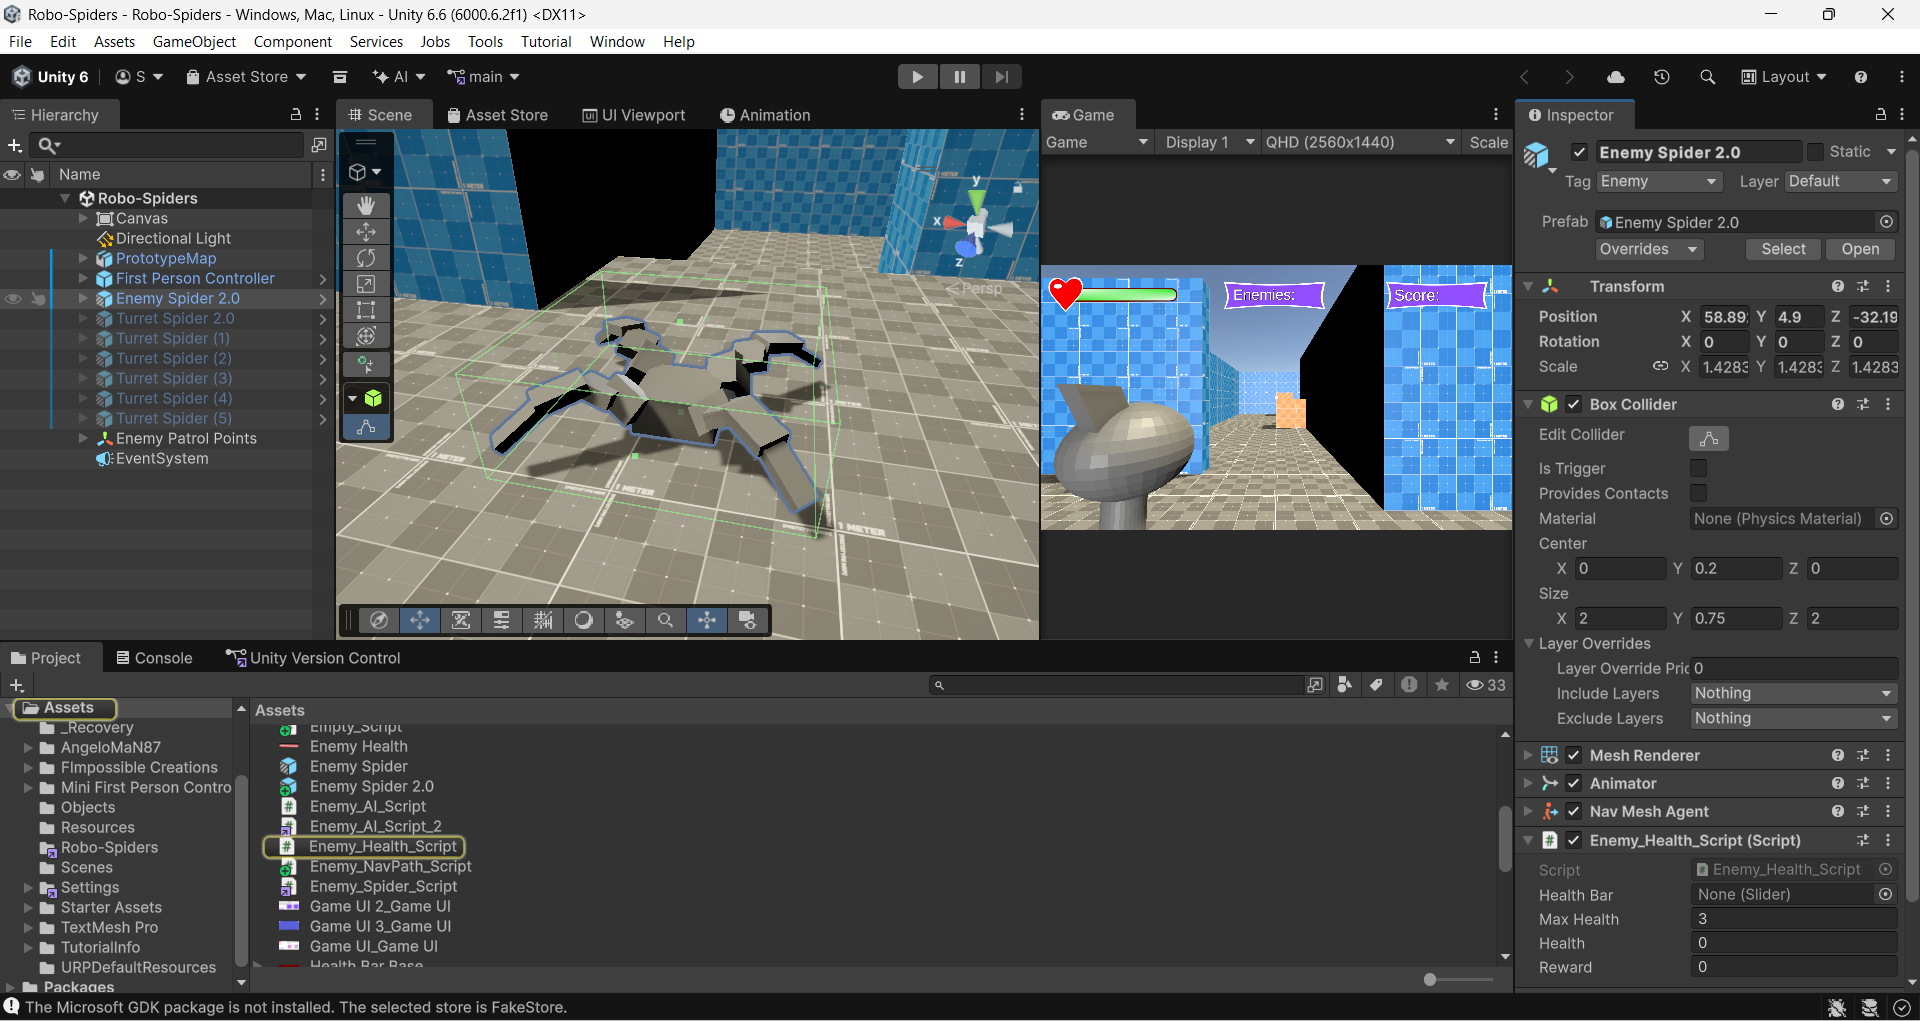
That’s a lot of buttons, I know. It can be overwhelming to look at at first, so let’s go over what some of the most useful ones do.
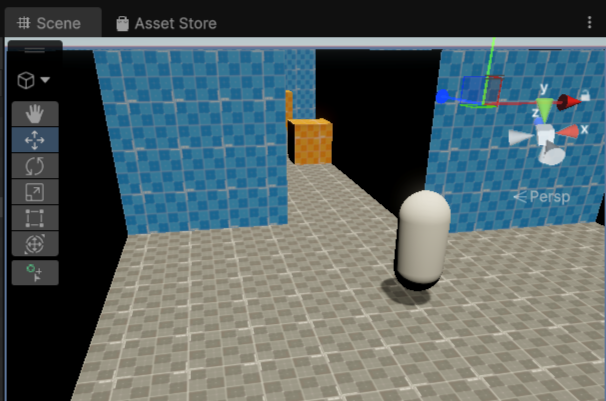
The vertical bar to the upper left contains the tools you’ll need to interact with your scene. The first is used to click and drag your view across this 3D space; right-click and drag to look around at any time without it. The second (which I had selected above) is used to move assets in-scene along the X, Y, & Z axis whereas the third rotates them. The fourth button can be used to scale objects in any dimension or proportionately in all by toggling the icon next to scale in the Transform component pictured above to the right. Each of these tools can quickly be accessed by pressing Q, W, E, and R respectively. Utilize the Transform component for the most precise editing if needed.
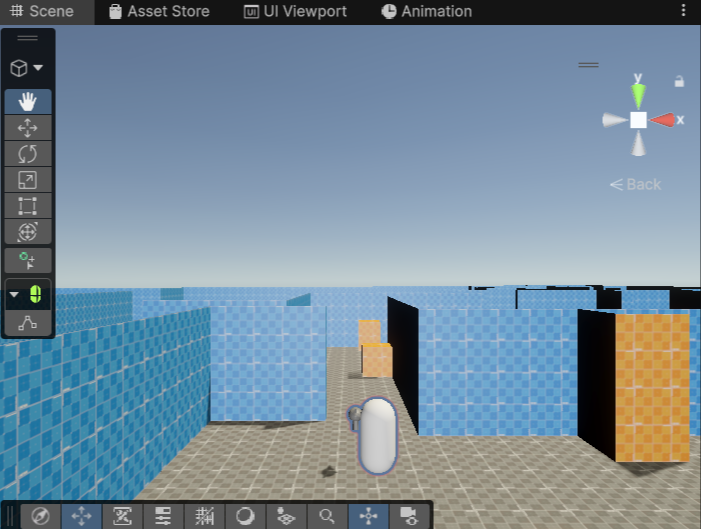
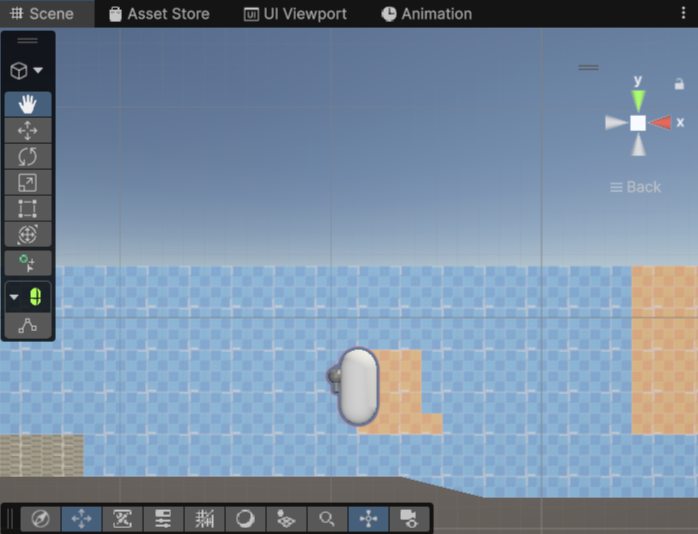
Last but not least, I’ll brush over the orientation control tool in the upper right corner of the scene. Click any of its directional cones to view your scene from that angle (left, right, front, back, top, bottom) or toggle the center to view everything from a more 2D perspective. If you want to see both your scene and game windows simultaneously like I have them, click and drag their respective tabs around, fit & adjust them to your liking.
Assets
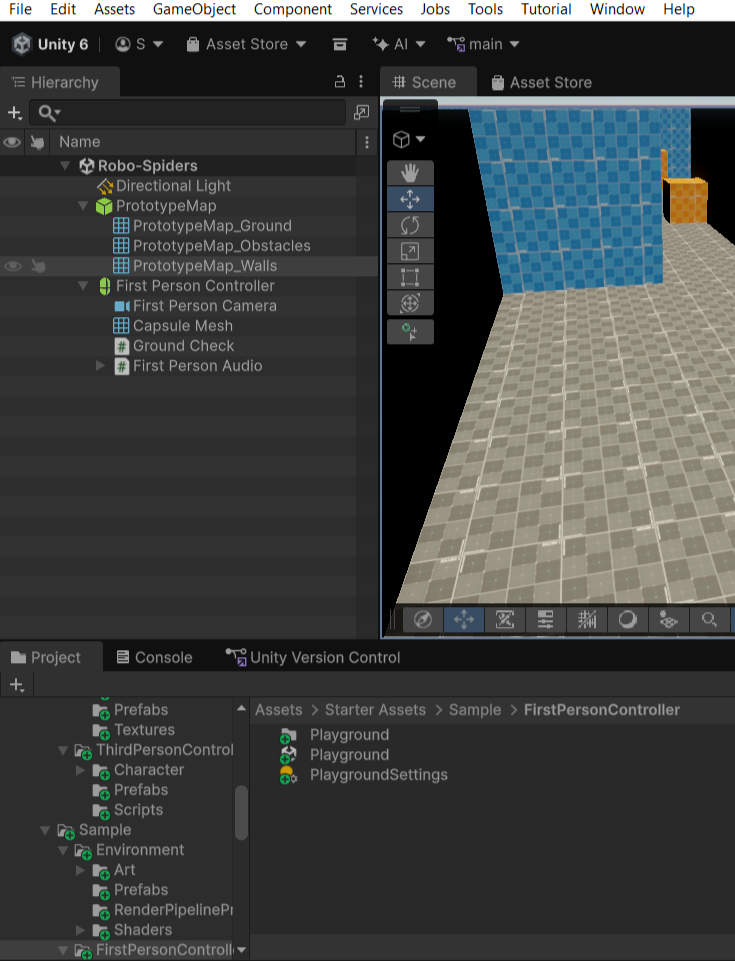
Assets are easily obtainable for free from Unity’s store, generously provided by Unity itself as well as the community of developers & designers like you or I. Once you’ve acquired some, click the Assets button at the very top of the window (third option) and select Import Asset Package or Import New Asset. From there, find your asset(s) to download and import into your project. Drag and drop them from your Project menu’s Asset folder below into your scene. You can also find all sorts of materials and textures to apply onto your assets just as easily, though they may appear blue while things load.
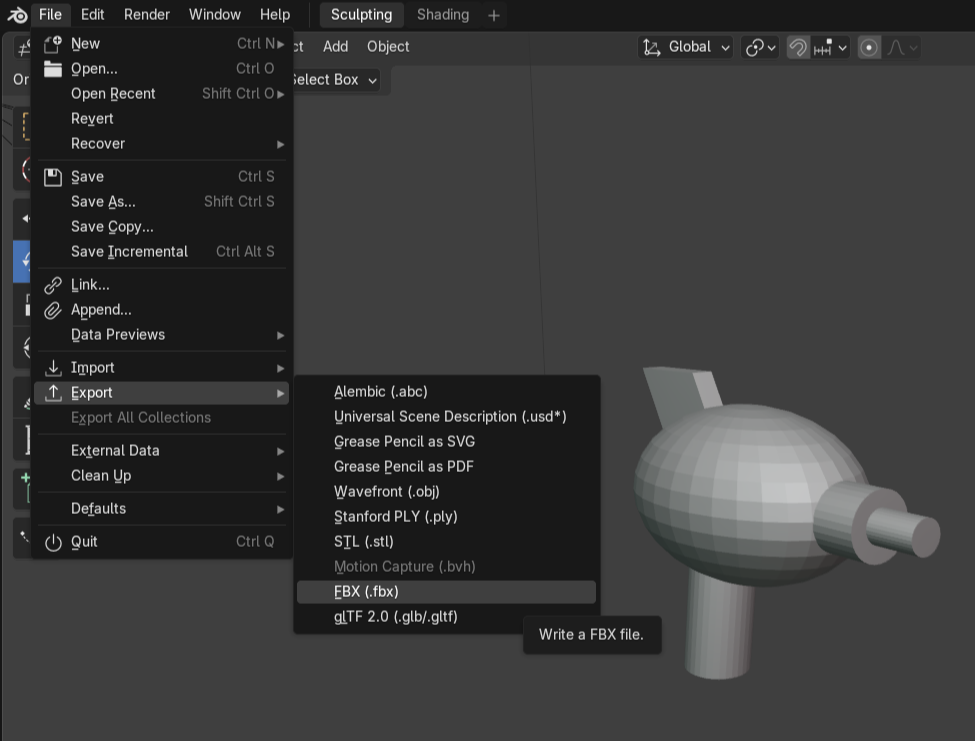
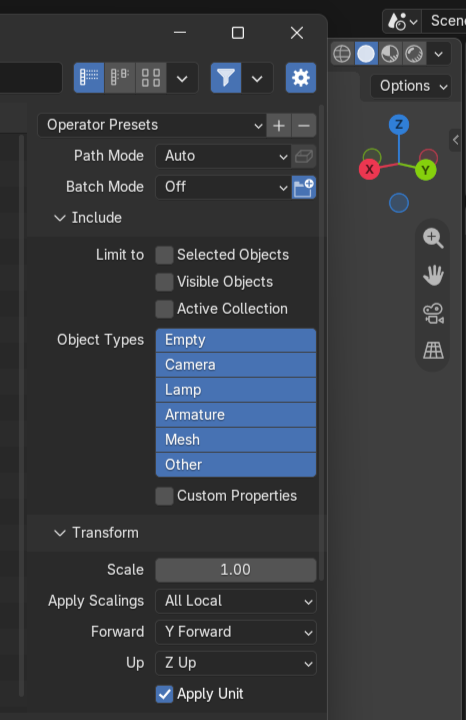
Alternatively, you can import assets of your own creation such as 3D models from Blender (pictured here) or from 2D design software (where I used Inkscape for UI). While it takes time to learn, you don’t have to be an expert to make assets yourself.
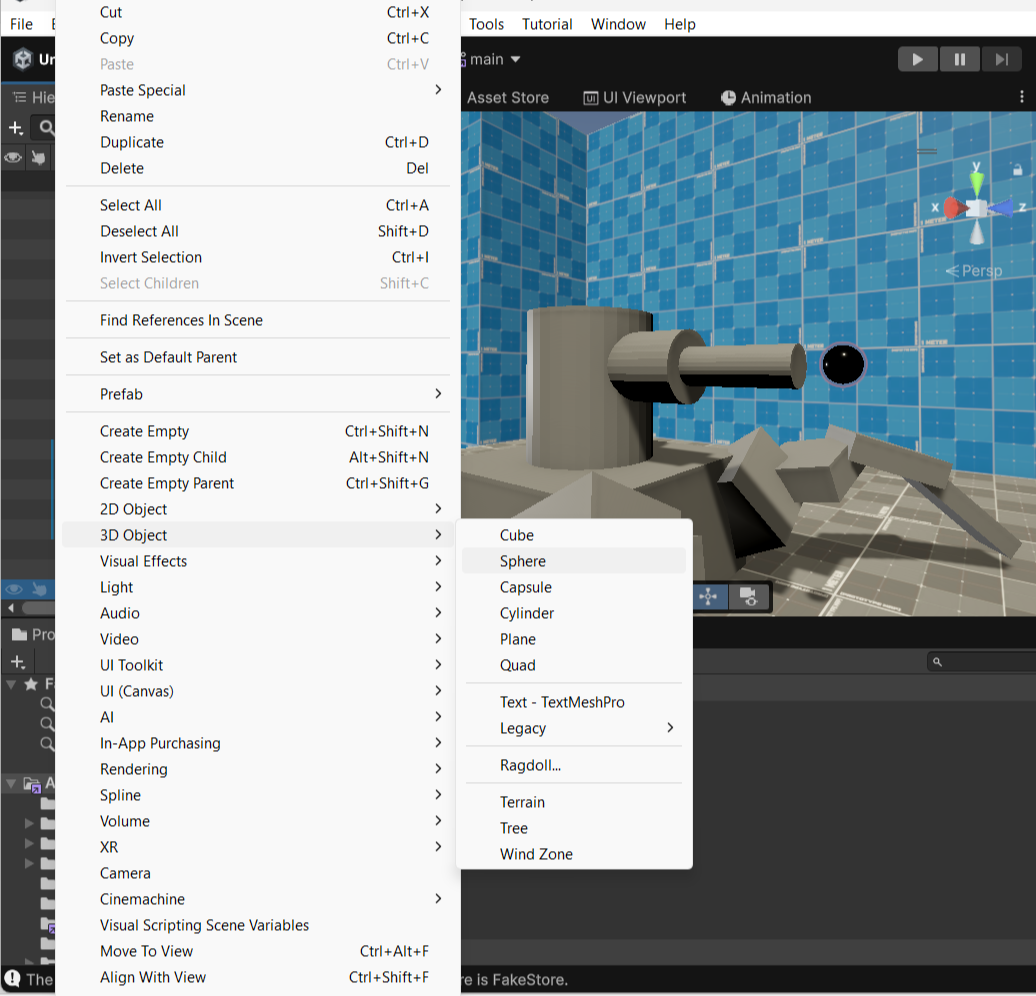
In fact, Unity makes it easy to create assets within the engine itself, accessible through the GameObjects button at the top of the window (right after Assets). You can also right-click any space within your game’s Hierarchy tab, which holds all assets you’ve added to your scene. From here, select anything from empty objects to 3D shapes to begin working on and don’t forget that frequent saving is your friend, as Unity is not immune to crashing. Either do so via the File button or by pressing Control S.
Components & Scripting
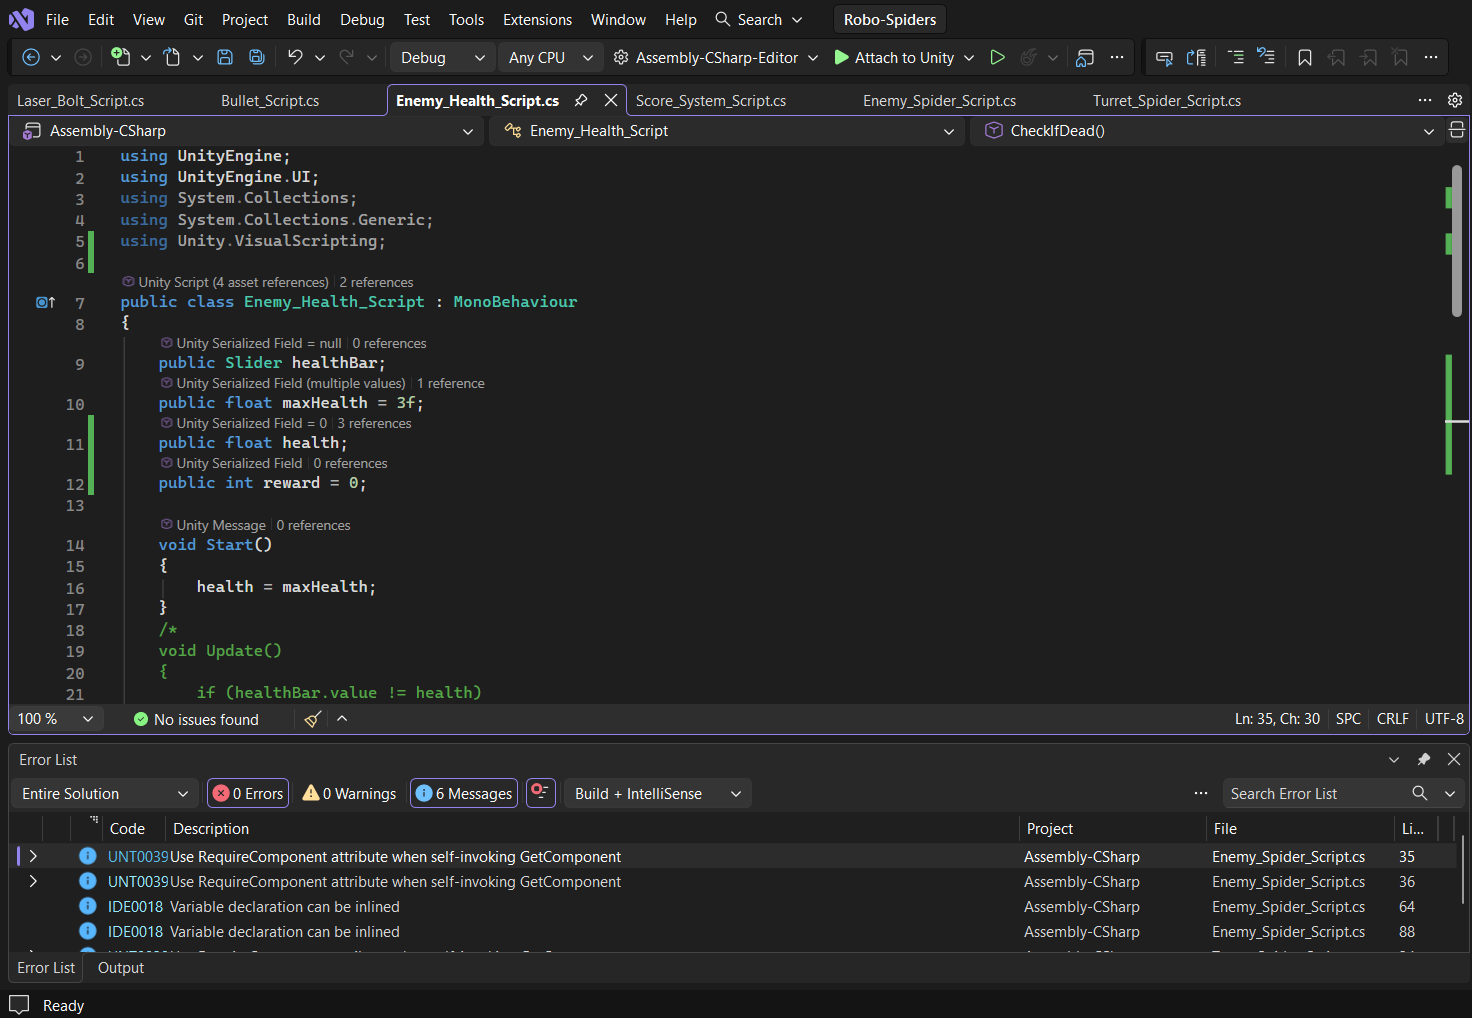
This is where you’ll see a lot going on especially, where even I still get stumped from time to time. Components are the bits and pieces that make your assets come to life in Unity’s digital world, from sound and lighting to navigation and collision. Scripting is yet another aspect of this, manageable in Visual Studio as you can see above. The vast majority of my scripting knowledge (C# in Unity) came from- believe it or not- YouTube tutorials. I thought it’d be too daunting to tackle a whole new coding language in such a short matter of time, but I’ve been pleasantly surprised (for the most part) by what I’ve learned thus far. Take the time to learn from others and don’t be afraid to ask for help if you are able. Just be wary that the videos you reference contain up-to-date versions of Unity and to remain aware of the dangers of downloading unknown code from anywhere off the internet.
Other Tips
Before we wrap up, I’ll share some things I learned that I believe would’ve helped me get through the project pictured above at least a bit sooner:
- If your character appears to be gliding across the map regardless of elevation changes, check & see that your floor/ground has a mesh collider rather than a box collider. Would’ve saved me from a ridiculous amount of stress and far too many hours wasted if only I’d zoomed out sooner.
- If your NPCs/enemies keep sinking into the ground as they move, consider a different method of movement for them, like relying on NavMesh components/code for example. Should they still behave in a way you do not prefer while you have very limited time, try turning their bugs into features in any way that you can. There’s a reason some of the enemies I’ve been working on have different versions.
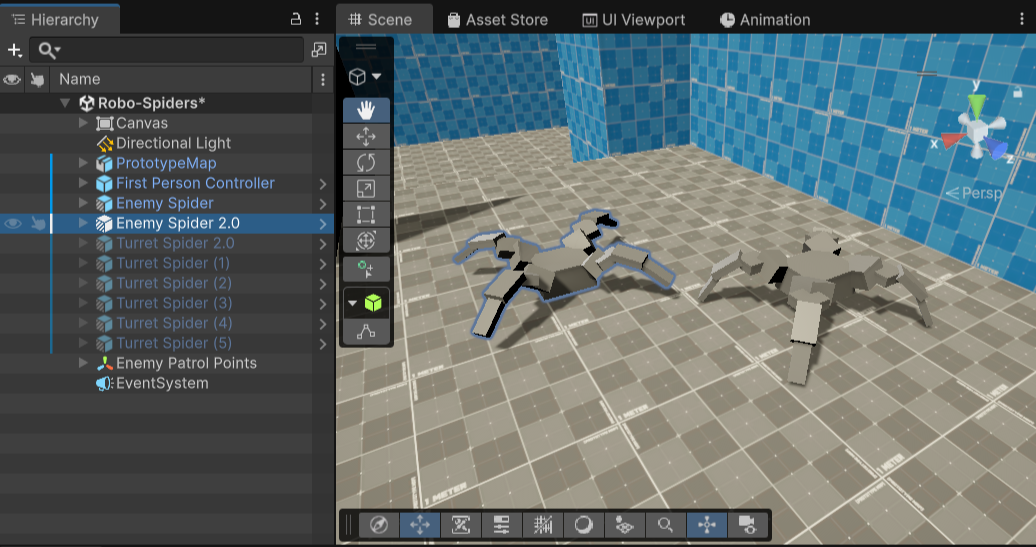
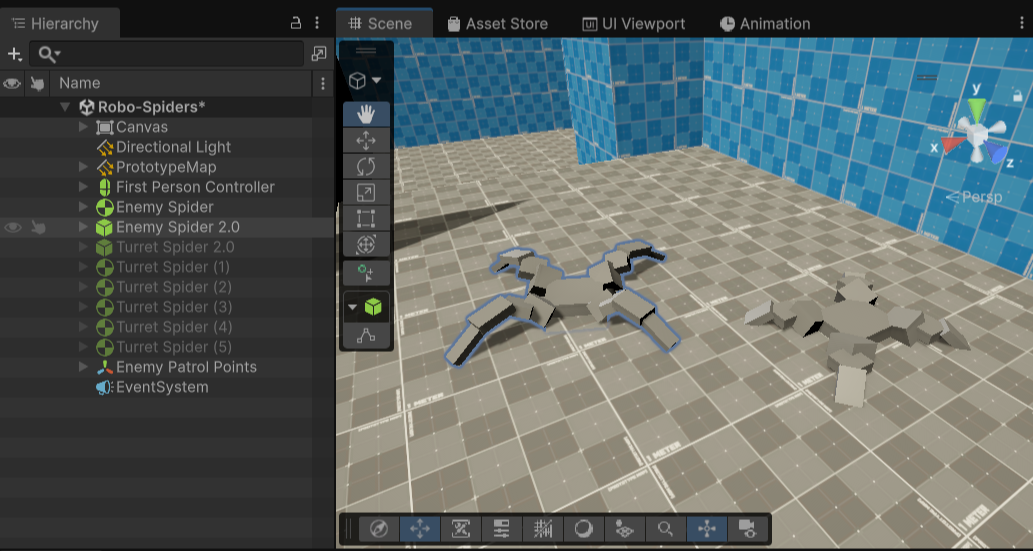
- If you keep getting stuck on something, shift your focus onto something else you can manage if it doesn’t rely on whatever you couldn’t fix. Think of it as skipping a hard question on a test so you can come back to it later. There’s no shame in that or finding some complex thing difficult to crack in the first place.
- If you want an asset you created to become a reusable prefab, you would do best to drag it directly to the Assets folder highlighted below, never over another asset you don’t intend on overriding. This may seem like a little thing, but the mistake I made was worse than accidentally deleting something.
(In case you didn’t know or I forgot, an asset’s prefab can be accessed by clicking the arrow to the right of its name in the Hierarchy. Exit by locating the back arrow to its left from Prefab Mode just below the search bar. Prefabs will reside in the Asset folder, acting as the “save” of that asset to easily use again later, even in other projects. Import them like any other asset from your files.)
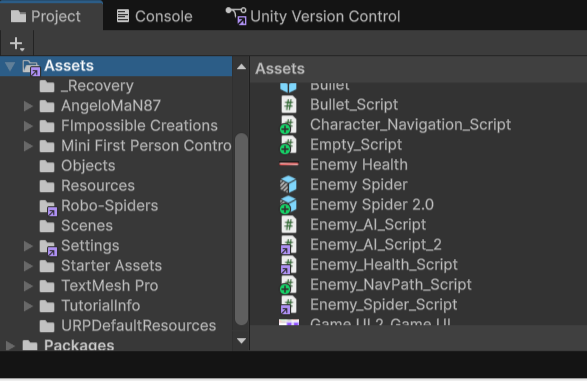
Deleting prefabs removes them from your project but can be restored via your recycle bin. Here, I had to rebuild mine (the Bullet at the top) from scratch and ran into bugs that only ate away at precious time I couldn’t get back. Neither action, among others, can be undone. Be very careful with your files.
Repositories & Exporting

Something vital to remember: Saving is short term, checking in is long term. This is where your version control comes into play. It provides a repository for any version of your project you decide to commit in case you’ve somehow broken something beyond repair. GitHub is a well-known tool for this, though I’ve stuck with Unity Version Control for simplicity’s sake as I had little idea on how to use the former as of writing this. Just make sure that you’ve selected all items that’ve been changed since your last check-in (if any prior) and write a comment detailing whatever’s important about it. Multiple team members can do the same through their repositories, so everyone’s work is smoothly integrated and made as manageable as possible for the project (although I worked alone at the time, so I wouldn’t fully know yet).
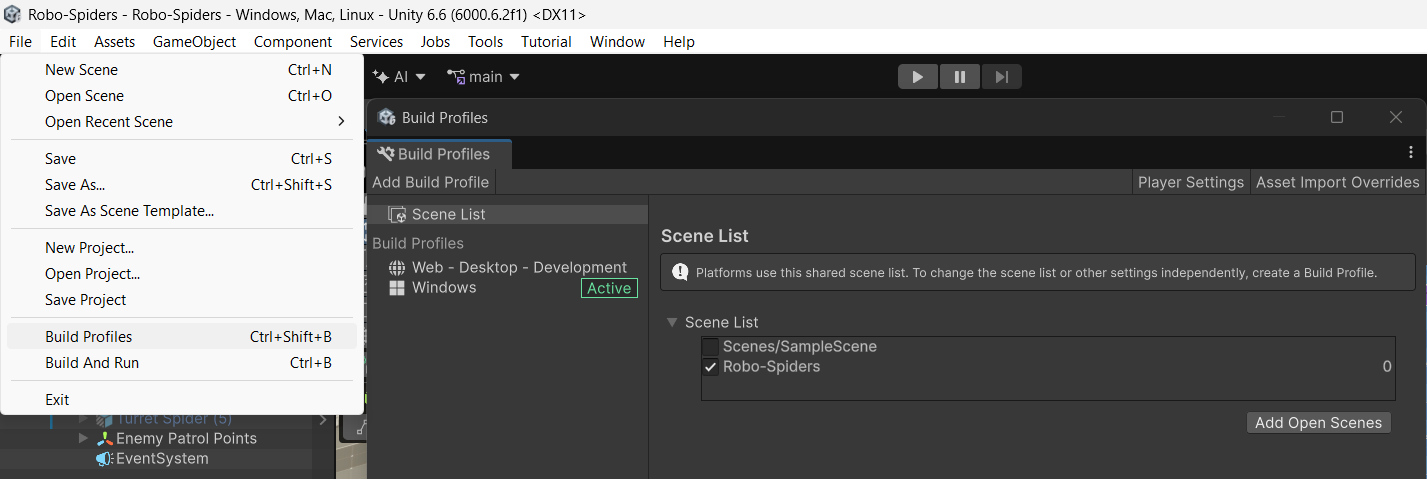
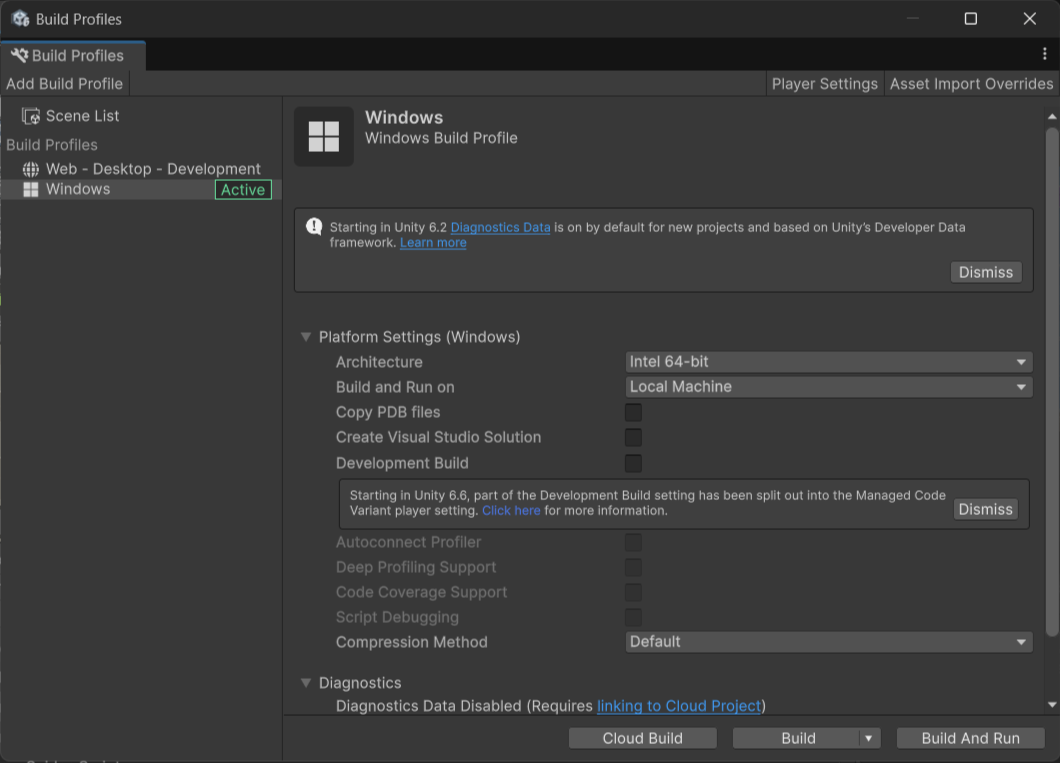
Now’s the moment we’ve all been waiting for once you’re ready to make your game playable for all the world to enjoy. Locate the Build Profiles from the File button up top and select the scene you want to export from the Scene List. Add a Build Profile if you haven’t already which is where you’ll select which platform(s) you’re exporting to. Here, I selected Windows and Web/Desktop, giving myself the options to make my game playable on other Windows PCs and on websites. At last, we can hit Build or Build And Run to begin playing immediately. You may or may not run into errors like I did (mere moments before this project of mine was due, no less) so be patient if you can and work through whatever issues have popped up. Don’t forget that you’ll need an empty folder to place your game inside of and then zip it up if you’d like before sharing.
My biggest problem at this crucial moment had been scripts running in the background, which was a no-no for Unity while exporting. At a teary loss, I moved to another app window (Microsoft Edge) to email the instructor of my Technologies for Game Design and Development course about my technical difficulties with submission when I noticed the build hadn’t paused due to the same error in a while. It was an odd fix, but I got it to work for both the Windows and Web builds I’d miraculously exported shortly before the deadline and submitted my project in the nick of time.
Conclusion
Technology can be infuriatingly weird and finicky, but you’re not alone. Google, YouTube, and various online community spaces are great helpers, the shared knowledge and experiences of others a treasure trove waiting to be dug up by those of us who’ll cherish it forever. Push through, be patient with yourself just as much as with your work if not more, remember to take breaks, and learn from your mistakes. Don’t give up on doing what you love or be afraid or ashamed of asking for help. Communicate, collaborate, and most importantly of all my fellow devs & designers, remember to have fun! 😀
I couldn’t have made it this far or done this without the love and support of my family and the help of my best friend. I wish y’all luck on your creative journeys and hope we see each other’s work someday. Stay tuned and God bless.