Tinkering with 3D Printing
My time with TinkerCad
This week, we were asked to explore one hour of coding OR one hour exploring 3D printing. My daughters received a 3D printer last Christmas and they are pros. I, however, am definitely a novice. Because I had already seen the printer in action, I initially decided to give coding a try! We are finally starting to develop a STEM/STEAM initiative in our school, and I’m curious about the applications of coding, especially after reading the article by Mary Moen (2016) about connecting coding with literacy in the library. Just reading the brief blog post made me think in a whole new way about the connections that libraries, literacy and computational thinking have with one another. I was fascinated and still am, and I can see myself jumping into CT (computational thinking) and its effects on lifelong learning at another time. However, I realized, having a two young children, that they are outlearning me in terms of technology. While they were out with my husband/their dad today, I decided that I was going to 3D print a gift for my eldest for her upcoming 11th birthday. How hard could this be? After all, I had a whole hour, right?
I read the blog post by Nathan Sekinger (2019), a middle school librarian who described the enthusiasm with which his students approached him and their eagerness to use the printer to create just about anything. I knew that this would be an exciting new addition to our own school’s library; currently, our SIGNET (our gifted program) students are the only ones in the school with direct access to a 3D printer, but I would love that to change. Having one in the library would make sense, and seeing all of the uses Mr. Sekinger described, it would be hard to argue that it wouldn’t make a great addition.
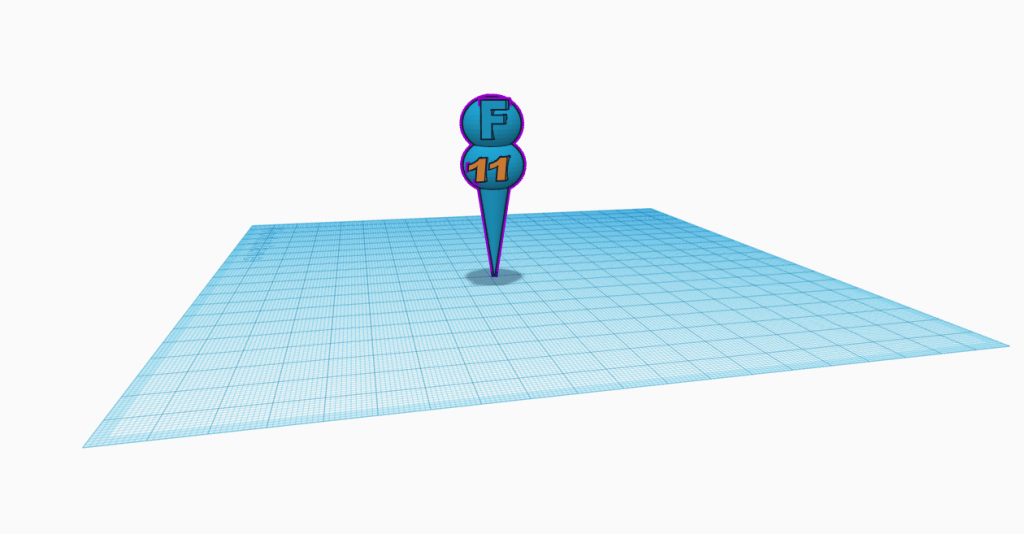
I jumped right into TinkerCad. The aforementioned eldest had used this program in school and I just knew that elementary gifted students, while gifted, aren’t more adept at learning than I am. Or are they? I started to get nervous, so I took the brief tutorial that led me through a serious of mini-activities to help learn placement, basic movements, scaling, and other components of good design. I was a pro because unlike my child, I like to follow directions. Well, after a few rounds of tutorial activities, I decided that I was going to skip ahead and just start creating. My timer was ticking away at that hour, and I wanted to have something in the end, after all. I searched some of the premade shapes for a lacrosse stick or hockey skate I could start with. The closest I found was a skateboard, and while that seems fun, it’s not really what I would call one of said daughter’s most favorite things. I went back to check out the basic shapes and saw a cone and a sphere. Ice cream cone! I would make her an ice cream cone with an “F” on it, her first name initial. I found the cone. I scaled it into a longer, sleeker size and I was doing great. Bring on the “sphere” ice cream! I got it onto my grid and resized it to match the basic dimensions of the cone. I then spent the next 15 minutes or so trying to get the ice cream lifted up to sit atop the cone. The ice cream got fat when I pulled it in one direction. It spun in circles when I used another button. It became an almost completely flat oval when I tried something else. I was able to manipulate this ice cream sphere into almost anything but a scoop of ice cream to set atop the cone. I was extra frustrated, because I’m used to using Windows Office programs and in TinkerCad there was not a “help” search box in which I could type my problem. There was no right-click option except to spin the grid to look at my “creation” from a different point of view. Finally, I found the “button” on my shape’s dimensional outline that raises and lowers the shape to the right height. I did it! I put the sphere on my cone and voila, I had an ice cream cone. I spun around the grid to inspect it in 3D and lo and behold, the cone and sphere were on two completely different parts of the grid. Sigh. Finally, I got them all lined up and decided I would decorate. I added an “F” relatively easily, as by this time, I was getting more comfortable with manipulating the shapes.
Believe it or not, I had some time left on my timer. I still had about 20 minutes to play around, so I decided to make a double-scoop ice cream cone and add an “11” to it, as well. I also added a “hole” in the top that will hopefully be the right size to hold a candle for her birthday pie. During my last few minutes, I found out how to select items on the grid and group them together into one piece and lock them so they were no longer editable. I also renamed it and found out how to export it to a printable 3D file. I saved it as an STL file that I can now print in time for my girl’s 11th birthday. This will be a perfect gift.
I just need her to come home to show me how to use the 3D printer.
References
Moen, M. (2016, September 30). Computer coding and literacy: Librarians lead the connection. [Blog}. International Literacy Association. https://www.literacyworldwide.org/blog/literacy-now/2016/09/30/computer-coding-and-literacy-librarians-lead-the-connection
Sekinger, N. (2019, February 28). Making a place for “3D” in our school library. [Blog]. IMADE3D. https://www.imade3d.com/2019/02/making-a-place-for-3d-in-our-school-library/
TinkerCad. (2022) Autodesk, Inc. https://www.tinkercad.com/
That is so cool that your daughter has a 3D printer. Good for you for creating something for her birthday!
Thank you for your post! Cool design. Clever to use two of the basic shapes .You need to update with a photo from her 3D printer! 🙂
You know, thinking back, I probably should have gone through some tutorials when I was playing around in Tinkercad. A friend of mine has a 3D printer, but I don’t think he’s created his own designs for the most part.
I had the hardest time figuring out how to raise a shape, in order to add it on top. I’m not proud to say this, along with aligning shapes, took up a large chunk of my time 🙂 Great job!
UPDATE: Well, I tried to print my creation, but the contact point with the printing pad was so small and unstable that printing the heavier “ice cream” on the top just made the whole thing jiggle and go off-kilter. I might be able to go back in there and fix it, but I’ll also have to change the “11” to a “12.” 😉
-Steph